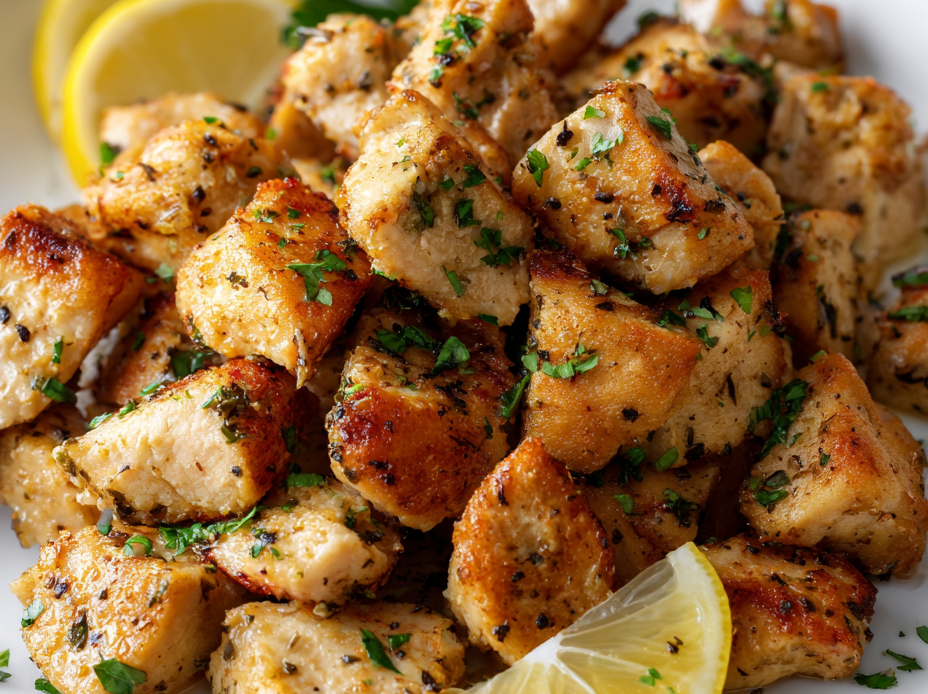
Making crispy chicken cubes on the stovetop might seem straightforward, but achieving that perfect crunch and juicy interior takes a bit of finesse. It’s about balancing heat, seasoning, and patience, even with ingredients you already have in your pantry. This recipe is my go-to for when I want something satisfying but don’t want to fuss over complicated techniques.
What I love most is how adaptable it is—whether as a snack, part of a stir-fry, or a quick dinner. It’s honest cooking, no fancy gadgets needed, just a reliable method that rewards you with crispy edges and tender bites. Plus, it smells amazing while cooking—garlic, chicken, a hint of spice, that’s the real homecoming scent.
Focusing on how to make perfectly crispy chicken cubes using a simple stovetop method that emphasizes texture and flavor, even with everyday ingredients.
The story behind this recipe
This recipe came together on a frantic weeknight when I needed something quick, satisfying, and made from what I had in the fridge. I remember the first time I got that perfect crispy exterior—crunchy, golden, and not greasy—while keeping the chicken juicy inside. It was a small victory that made me realize how simple ingredients, treated right, can turn into something special. Since then, I’ve kept tweaking the seasoning and cooking method, always chasing that balance of crispness and tenderness.
Key ingredients and tips
- Chicken breasts: I opt for boneless, skinless breasts—they cook evenly and stay juicy if not overdone. Try slicing into uniform cubes for even crisping.
- Cornstarch: I coat the chicken in a light layer of cornstarch—gives that satisfying crunch. Double-dip for extra crispness if you like it really crunchy.
- Garlic powder: I love a good dusting of garlic powder—it adds flavor without moisture, helping the coating stick. Adjust to taste, but don’t skip it.
- Salt & pepper: Season generously—salting helps with flavor and crisping. Taste your seasoning before cooking, as it can make or break the dish.
- Oil: Use a neutral oil with a high smoke point—something like vegetable or canola. Keep the heat at medium-high; you want a sizzle, not smoke.
- Optional spices: Paprika or cayenne add warmth and color. I sprinkle a little for smoky depth or heat, but keep it balanced so it doesn’t overpower.
- Lemon juice (at the end): Brightens everything up. Squeeze fresh lemon over the chicken just before serving—makes the flavor pop and cuts through the richness.
Spotlight on key ingredients
Chicken breasts:
- I choose boneless, skinless breasts—they cook evenly and stay juicy if not overdone. Slice into uniform cubes for even crisping.
- Cornstarch: I coat the chicken lightly in cornstarch—this creates that satisfying crunch. Double-dip for extra crispness if you really want it crispy.
Seasoning & Oil:
- Garlic powder: I love a good dusting—adds flavor without moisture, helping the coating stick and infuse with savory aroma. Adjust to taste, don’t skip it.
- Oil: Use a neutral, high-smoke-point oil like vegetable or canola. Keep the heat at medium-high; you want a sizzle, not smoke, to get that perfect crisp.
Notes for ingredient swaps
- Dairy-Free: Swap milk or yogurt in marinades with coconut milk for a subtle sweetness, but expect a slightly richer texture.
- Low-Sodium: Use less salt in the seasoning and opt for salt-free spices to control salt intake without losing flavor.
- Gluten-Free: Replace cornstarch with rice flour or arrowroot powder for a crisp exterior without gluten.
- Herb Boost: Add fresh herbs like thyme or cilantro to the coating for a burst of fresh aroma, though they may burn quicker.
- Spice Level: Incorporate cayenne or chili powder into the coating for heat—start small, then adjust to taste.
- Oil Choice: Use avocado oil for a milder flavor and higher smoke point, or opt for sesame oil for an aromatic twist.
- Lemon Brightness: Substitute lemon juice with lime or vinegar for a different tang, adding a zing that cuts through the richness.
Equipment & Tools
- Large skillet: To cook the chicken evenly and achieve a crispy crust.
- Tongs: To turn and remove chicken cubes without breaking the coating.
- Paper towels: To drain excess oil and keep the chicken crispy.
- Mixing bowl: To coat chicken evenly with seasoning and cornstarch.
Step-by-step guide to crispy chicken cubes
- Equipment & Tools: Use a large, heavy-bottomed skillet for even heat distribution. Have a mixing bowl for coating, tongs for turning, and a paper towel-lined plate for draining.
- Prepare the chicken: Cut boneless, skinless chicken breasts into 1-inch cubes. Pat dry with paper towels to remove excess moisture, which helps crisping.
- Season & coat: Mix salt, pepper, garlic powder, and paprika in a small bowl. Toss chicken cubes in the seasoning, then in cornstarch until evenly coated. For extra crunch, double-dip—re-coat the chicken after the first layer.
- Heat oil: Pour about 1/2 inch of oil into your skillet. Heat over medium-high until shimmering (~180°C/350°F). You should see a faint crackle when dropping a coated cube.
- Fry in batches: Carefully add chicken cubes, avoiding overcrowding. Fry for 3–4 minutes, turning occasionally to get an even, golden-brown crust. Look for crispy edges and a fragrant smell.
- Check doneness: Use tongs to lift a piece—should be deep golden, with a crispy exterior and no pink inside. The internal temperature should reach 75°C/165°F if checked with a probe.
- Drain & rest: Remove chicken with tongs, drain on paper towels. Let rest for 2 minutes to settle and keep crisp.
- Final touch: Squeeze fresh lemon over the hot chicken cubes for brightness and a hint of acidity. Serve immediately for best crunch and flavor.
Let the chicken rest for 2 minutes after frying. Finish with a squeeze of lemon and serve hot on a warm plate, ensuring the crispness stays intact.
How to Know It’s Done
- Golden-brown crust with a crackling sound during frying.
- Internal temperature of 75°C/165°F for safe, juicy bites.
- Crispy exterior with no excess oil on draining paper.
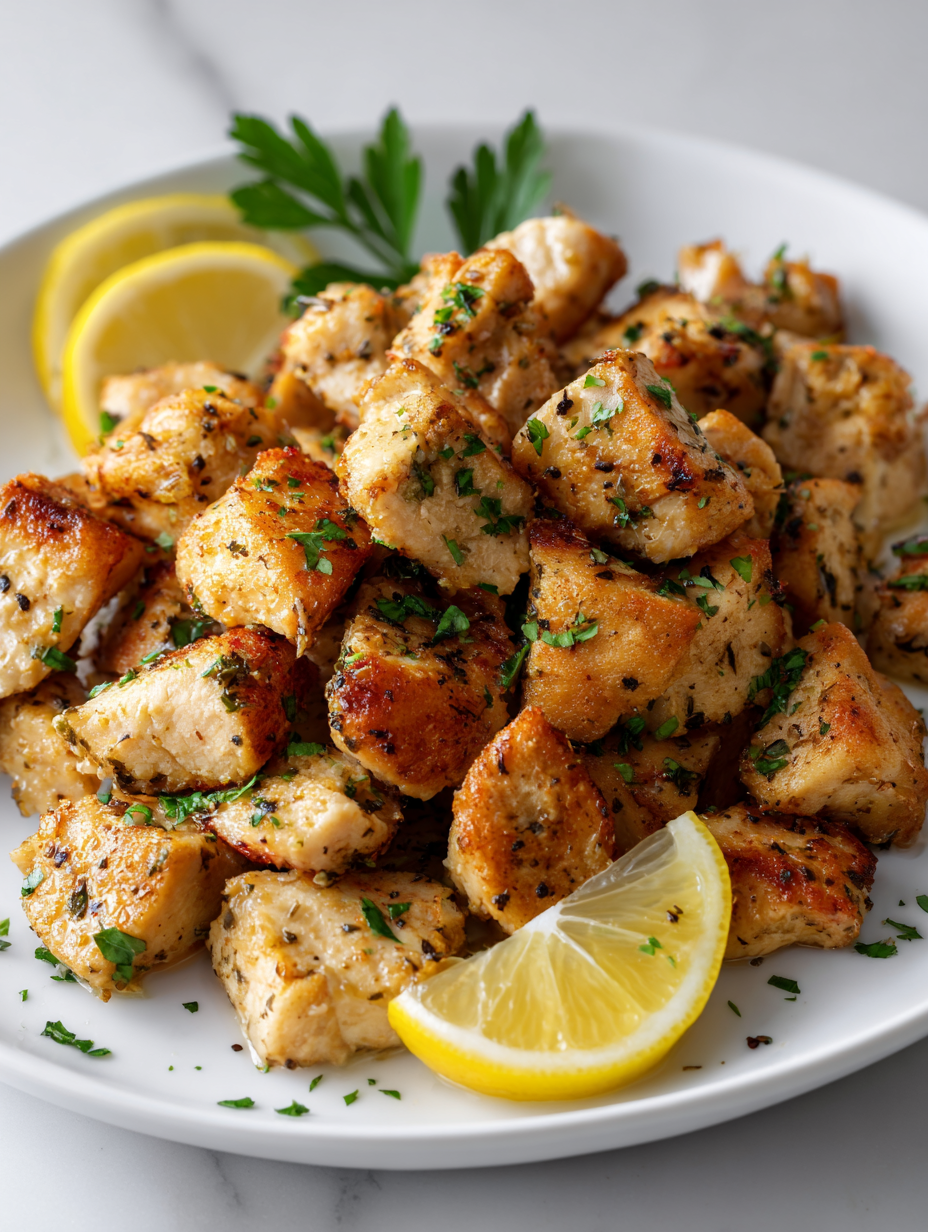
Crispy Skillet Chicken Cubes
Ingredients
Equipment
Method
- Pat the chicken cubes dry with paper towels to remove excess moisture, which helps achieve a crispy coating.
- In a mixing bowl, combine garlic powder, salt, and black pepper. Toss the chicken cubes in the seasoning mixture until evenly coated.
- Sprinkle cornstarch over the seasoned chicken, then toss again until all pieces are coated in a thin, even layer of starch. For extra crunch, you can double-dip by re-coating the chicken after the first layer.
- Pour about 1/2 inch of oil into a large skillet and heat over medium-high until shimmering and a small breadcrumb sizzles when dropped in, indicating it's around 180°C (350°F).
- Add the coated chicken cubes carefully into the hot oil using tongs, making sure not to overcrowd the pan. Fry in small batches if needed.
- Fry the chicken for 3–4 minutes, turning occasionally with tongs, until golden brown and crispy on all sides. You’ll hear a satisfying crackle as they fry.
- Use tongs to remove the chicken from the oil and place on paper towels to drain excess oil. Rest for about 2 minutes to help lock in crispness and juices.
- Squeeze fresh lemon juice over the hot chicken cubes for brightness and a flavor boost. Serve immediately to enjoy the crispy texture at its best.
Pro tips for crispy chicken cubes
- Bolded mini-head: Use a light, even coating of cornstarch for maximum crunch without greasiness.
- Bolded mini-head: Keep oil at consistent medium-high heat—too hot and the coating burns, too low and it’s greasy.
- Bolded mini-head: Toss chicken cubes in seasoning just before coating—this prevents clumping and uneven flavor.
- Bolded mini-head: Fry in small batches—overcrowding drops the oil temperature and soggifies the coating.
- Bolded mini-head: Use tongs to turn chicken—this keeps the coating intact and prevents breakage.
- Bolded mini-head: Rest the fried chicken for 2 minutes before serving—this helps lock in crispness and juices.
- Bolded mini-head: Finish with a squeeze of lemon—brightens flavors and cuts through the richness, especially when hot.
Common mistakes and how to fix them
- FORGOT to dry chicken properly → Pat thoroughly for crispier coating.
- DUMPED too much oil → Use enough oil to cover the bottom, not deep-fry level.
- OVER-TORCHED the chicken → Keep an eye on heat; adjust if coating darkens too fast.
- MISSED resting time → Rest briefly after frying to lock in crispness and juices.
Quick fixes and pantry swaps
- When oil shimmers, splash a tiny bit of water to test for readiness.
- If chicken sticks, patch with a little more oil and don’t overcrowd the pan.
- Splash vinegar or lemon to cut through excess greasiness and brighten flavors.
- Dumped too much salt? Rinse briefly and pat dry before refrying for balance.
- When the coating isn’t crispy enough, rescue with a quick blast in a hot oven for 5 minutes.
Prep, store, and reheat tips
- Prep the chicken cubes by cutting and seasoning them a day in advance—keep in an airtight container in the fridge for up to 24 hours. The flavors deepen overnight.
- Coating the chicken in cornstarch can be done ahead; just keep the coated pieces covered in the fridge for up to 4 hours to maintain crispness.
- Store cooked chicken cubes in an airtight container in the fridge for up to 2 days. Reheat in a hot skillet to regain some crispiness and warm through, around 3-4 minutes.
- Reheating can slightly soften the coating; for best results, reheat in a hot skillet with a splash of oil until crispy again, watching for that golden crackle.
- Frozen cooked chicken cubes can last up to 3 months. Thaw overnight in the fridge, then reheat as above. Expect a slight loss in crunch but still flavorful and juicy.
Top questions about chicken cubes
1. Can I use chicken thighs instead?
Use chicken breasts for tender, juicy bites. Cut into uniform 1-inch cubes for even cooking and crisping.
2. Should I double-dip the chicken?
Coat the chicken in a thin layer of cornstarch to achieve that satisfying crunch. Double-coating boosts crispiness.
3. How do I know when the oil is hot enough?
Aim for oil temperature around 180°C (350°F). When shimmering and a small breadcrumb sizzles, it’s ready to fry.
4. How many chicken cubes can I fry at once?
Fry in small batches to prevent overcrowding, which cools the oil and makes the coating soggy. Turn occasionally until golden.
5. Should I drain the chicken after frying?
Rest the fried chicken for 2 minutes on paper towels. This helps keep them crispy and juicy inside before serving.
6. Can I skip lemon juice?
Add a squeeze of lemon just before serving. It brightens the flavor and balances the richness of crispy chicken.
7. How long can I keep leftovers?
Store cooked chicken in an airtight container in the fridge for up to 2 days. Reheat in a hot skillet to regain crispness.
8. Can I freeze raw chicken cubes?
Yes, frozen cooked chicken cubes last about 3 months. Thaw overnight in the fridge, then reheat in a hot skillet for best texture.
9. How can I add more flavor?
Adjust seasoning to taste. For extra flavor, toss cooked cubes with fresh herbs or a spicy glaze before serving.
10. What if my chicken isn’t crispy?
If the coating isn’t crisp enough, increase heat slightly or finish in a hot oven for 5 minutes to crisp up.
This chicken cubes recipe is what I make when I want something crispy and honest, no fuss, just flavor. It’s a simple dish that reminds me how everyday ingredients can turn into something satisfying with a little attention. The scent of garlic, that crackling sound, and the tang of lemon make every bite worth the effort.
In busy weeks or quiet nights, this dish stays reliable—a reminder that good, crispy chicken is always within reach. It’s a small act of comfort, a way to bring a little more joy to the table without overthinking. Sometimes, that’s exactly what I need.

Hi, I’m Madison Greene, the creator behind Texture Obsessed. If you have ever fallen in love with the crunch of a perfectly toasted crust, the silkiness of a smooth custard, or the contrast between crispy and creamy in a single bite, then you already understand what inspires me.

