Leftover turkey often ends up sliced cold on a plate or tossed into soup, but I like to think it can be something more portable, more fun. These turkey roll ups are my go-to for busy evenings when I want comfort but don’t want to fuss. They’re built for simplicity, packed with flavor, and easy to customize based on what’s in the fridge.
There’s something surprisingly satisfying about wrapping turkey with a smear of cream cheese, a crunch of fresh herbs, and a little zing from lemon or mustard. It’s the kind of recipe that feels like a secret handshake—something you can whip up in minutes and still impress. Plus, it makes great leftovers, turning tired turkey into a new, crave-worthy snack or meal.
I love how these roll ups bridge the gap between a quick snack and a full meal. No rolling pin, no complicated sauces—just honest ingredients coming together in a way that feels both cozy and clever. If you’ve got leftover turkey lurking in the fridge, this one’s worth a shot. It’s honest, straightforward, and somehow makes the day’s chaos seem a little more manageable.
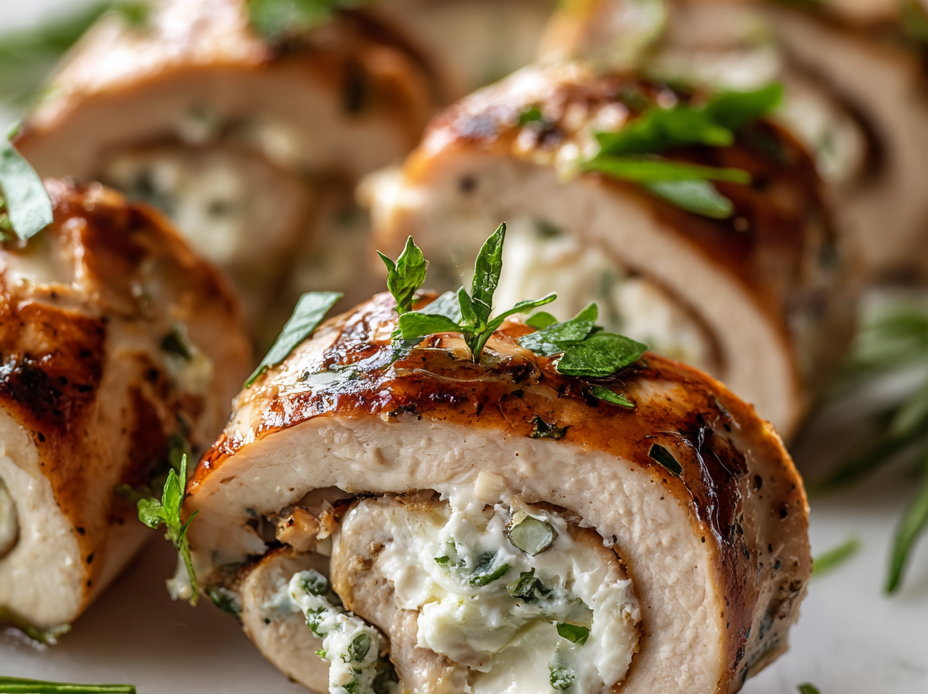
Transforming leftover turkey into a cozy, handheld meal that feels like a warm hug on busy weeknights.
The story behind this recipe
- This recipe was born out of a lazy Sunday afternoon, with a fridge full of odds and ends and a craving for something comforting yet quick. I remember the smell of toasted bread mixing with the herbal punch of fresh parsley—that moment of inspiration struck when I realized leftover turkey could be something more fun than just sandwiches.
- It’s a dish that’s evolved from family remnants and spontaneous kitchen experiments, turning plain turkey into a portable, satisfying snack. I love how it feels like a little secret—something familiar but fresh, ready to be assembled in minutes and enjoyed with no fuss.
- Every time I make these, I think about how simple ingredients can come together to create a dish that’s both homey and a little unexpected. It’s my go-to when I need quick comfort, but also a reminder that leftovers can be anything but boring.
Key ingredients and tips
- Turkey breast: I prefer leftover roasted turkey, the kind that’s a bit juicy but not greasy. If yours is dry, a quick brush of gravy helps keep it tender and flavorful.
- Cream cheese: I like a softened, tangy spread that melts easily. Swap in Greek yogurt for a lighter touch, but expect a slightly runnier texture.
- Fresh herbs: Parsley and basil give a bright, herbal pop. Dried herbs can work in a pinch, but they won’t deliver that fresh, vibrant aroma I love.
- Lemon zest: It adds a zing that cuts through richness. Skip if you’re not a fan of citrus, but your roll-ups might lose a little sparkle.
- Mustard: A good Dijon brings a subtle heat and depth. Honey mustard can add a touch of sweetness if you’re feeling it, but keep it balanced.
- Wraps: I use large spinach or sun-dried tomato tortillas for flavor and color. Regular flour tortillas are fine, but they won’t have quite the same impact.
- Extra fillings: Thinly sliced cucumbers or crispy greens add crunch. Feel free to toss in shredded cheese or chopped olives for more personality.
Spotlight on key ingredients
Turkey breast:
- I prefer leftover roasted turkey, the kind that’s a bit juicy but not greasy. If yours is dry, a quick brush of gravy helps keep it tender and flavorful.
- Cream cheese: I like a softened, tangy spread that melts easily. Swap in Greek yogurt for a lighter touch, but expect a slightly runnier texture.
- Fresh herbs: Parsley and basil give a bright, herbal pop. Dried herbs can work in a pinch, but they won’t deliver that fresh, vibrant aroma I love.
Cream cheese:
- I like a softened, tangy spread that melts easily. Swap in Greek yogurt for a lighter touch, but expect a slightly runnier texture.
- Fresh herbs: Parsley and basil give a bright, herbal pop. Dried herbs can work in a pinch, but they won’t deliver that fresh, vibrant aroma I love.
Notes for ingredient swaps
- Dairy-Free: Swap cream cheese for hummus or mashed avocado. Expect a creamier texture and a slightly nuttier flavor.
- Low-Sodium: Use reduced-salt turkey and skip added salt in fillings. The dish will taste milder but still flavorful.
- Gluten-Free: Opt for gluten-free wraps like rice paper or corn tortillas. They may be a bit more delicate to handle.
- Vegan: Replace turkey with marinated, thinly sliced tofu or tempeh. Use vegan cream cheese or tahini spread for richness.
- Herb Variations: Swap parsley and basil for cilantro or dill. Fresh herbs make a big difference in brightness and aroma.
- Citrus: Omit lemon zest or replace with a splash of orange juice for a sweeter, softer citrus note.
- Spicy: Add a dash of hot sauce or finely chopped jalapeños inside for a spicy kick. Adjust to your heat preference.
Equipment & Tools
- Sharp knife: For precise slicing and rolling.
- Cutting board: To prepare and assemble ingredients cleanly.
- Non-stick skillet: For searing and crisping the roll-ups evenly.
- Spatula or tongs: To flip and handle hot roll-ups safely.
- Small spoon or spatula: To spread cream cheese neatly.
Step-by-step guide to turkey roll ups
- Gather all ingredients and equipment first—makes the process smoother. Use a sharp knife, a cutting board, and a small spoon or spatula.
- Lay out the turkey slices on a clean surface. If they’re a little dry, give them a quick brush with a touch of broth or gravy to add moisture.
- Spread a thin layer of cream cheese over each slice, covering evenly but not too thick. This will help hold everything together.
- Sprinkle chopped herbs, lemon zest, and a tiny squeeze of mustard over the cream cheese—layer flavor and color.
- Place your chosen fillings—thin cucumber slices, greens, or shredded cheese—at one edge of the turkey slice.
- Carefully roll up each turkey slice tightly, starting from the filled edge, to keep everything enclosed. Use your hands or a toothpick if needed.
- Heat a non-stick skillet over medium heat (about 160°C/320°F). Once hot, add the roll-ups seam-side down. Sear for 2–3 minutes until golden and slightly crisp.
- Flip and sear the other side for another 2 minutes. Check for a warm, slightly toasted exterior and a melted, oozy interior.
- Remove from heat and let rest for 1–2 minutes. Resting helps the flavors meld and keeps the roll-ups from falling apart.
- Plate with a drizzle of lemon or a fresh herb garnish. Serve warm or at room temperature, depending on your preference.
Let the roll-ups rest on a plate for 1–2 minutes to settle. Finish with a squeeze of lemon juice and a sprinkle of fresh herbs. Serve warm or at room temperature, sliced in half if desired.
How to Know It’s Done
- Golden, crisp exterior with a slight sheen from searing oil.
- Internal temperature reaches about 60°C/140°F for warmed-through meat.
- Cream cheese is softened and slightly melty, not rubbery or dry.
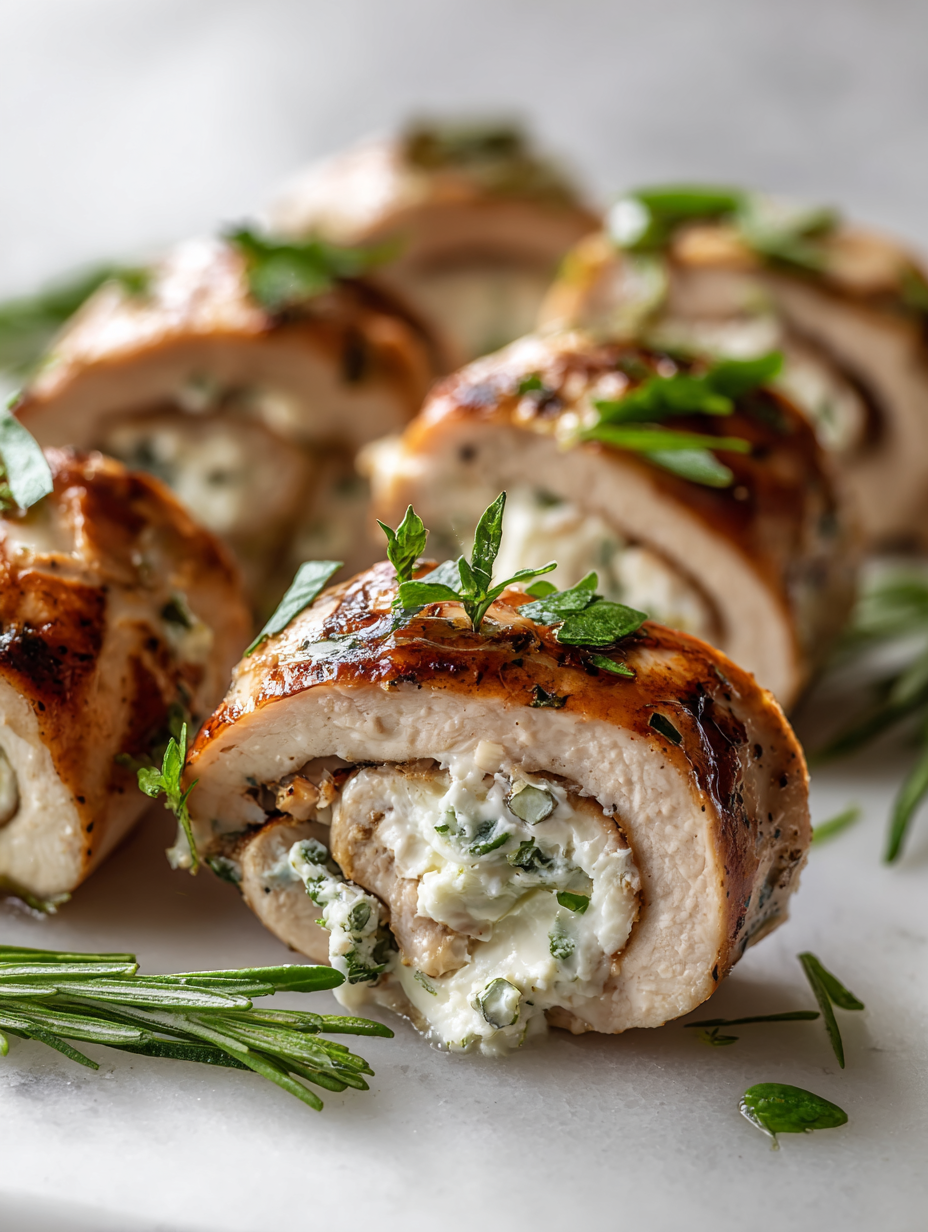
Turkey Roll-Ups with Cream Cheese and Herbs
Ingredients
Equipment
Method
- Lay out the turkey slices on a clean cutting board, and if they seem a little dry, give each a quick brush with a bit of broth or gravy to add moisture.
- Using the back of a small spoon or spatula, spread a thin, even layer of softened cream cheese over each turkey slice, covering the surface completely.
- Sprinkle chopped fresh herbs and lemon zest over the cream cheese, then add a small dollop of Dijon mustard for a little zing.
- If desired, place thin slices of cucumber or a handful of greens at one edge of each turkey slice for added crunch and freshness.
- Carefully roll up each turkey slice tightly from the filled edge, making sure all the filling stays enclosed. Press gently to seal the seam.
- Heat a non-stick skillet over medium heat until it’s hot but not smoking. Carefully place the roll-ups seam-side down in the skillet.
- Sear the roll-ups for about 2–3 minutes on each side, until the outside turns golden brown and slightly crisp, and the filling begins to melt.
- Use tongs or a spatula to flip the roll-ups gently, searing each side until golden and heated through. The aroma of toasted herbs and melting cheese will fill the air.
- Remove the roll-ups from the skillet and let them rest on a plate for 1–2 minutes, allowing the filling to set slightly for neater slicing and eating.
- Slice the roll-ups in half if desired, drizzle with a squeeze of lemon juice, and garnish with additional herbs for a fresh finishing touch.
Notes
Pro tips for perfect turkey roll ups
- Bold the seam: Press gently to seal the roll-up, preventing unravelling during searing.
- Sear with confidence: Use medium heat (160°C/320°F) until the exterior is golden and crisp, about 2-3 minutes per side.
- Avoid overcrowding: Give each roll-up space in the pan to ensure even browning and prevent steaming.
- Check for doneness: The outside should be crunchy, and the interior warm and slightly oozy from the melted cheese.
- Rest before slicing: Let the roll-ups sit for 1-2 minutes post-searing to help the filling set and prevent spilling.
Common mistakes and how to fix them
- FORGOT to pat dry turkey slices → results in soggy roll-ups, pat dry for crispness.
- DUMPED cheese mixture → causes uneven filling, spread evenly to prevent slipping.
- OVER-TORCHED pan → burns the outside, keep heat moderate for even searing.
- MISSED resting time → leads to falling apart, rest for at least 2 minutes to set.
Quick fixes for smooth cooking
- If pan smokes, splash in a little water to tame the heat and shimmer.
- When roll-ups fall apart, patch with a toothpick or re-sear briefly for stability.
- Splash a bit of broth on dry turkey slices to revive moisture before rolling.
- Shield delicate wraps with a damp paper towel if they start to crack or dry out.
- When in doubt, pantry swap: use spinach tortillas instead of regular, for extra flavor and color.
Prep, store, and reheat tips
- Prep the filling ingredients—spread, herbs, and fillings—up to a day ahead in the fridge; they’ll stay fresh and flavorful.
- Assemble the roll-ups (without searing) and store them tightly wrapped in plastic wrap for up to 24 hours; the flavors meld nicely while staying moist.
- Refrigerate leftovers in an airtight container for 2–3 days. The turkey may lose some juiciness but will still be tasty when reheated.
- Reheat gently in a 160°C (320°F) oven for 8–10 minutes, or microwave at medium power in short bursts, checking for warm, oozy cheese and a fragrant aroma.
Top questions about Turkey Roll Ups
1. Can I use pre-cooked turkey from the store?
Use leftover cooked turkey, preferably roasted, sliced thin for easy rolling and even cooking.
2. Can I start with sliced turkey instead of roasting it myself?
Yes, but ensure it’s sliced thin and not too dry; a quick brush with broth helps.
3. Do the turkey slices need to be thawed if frozen?
Absolutely, just make sure it’s sliced thin enough to roll easily without tearing.
4. Can I prepare these ahead of time and cook later?
Yes, let frozen turkey thaw completely in the fridge before assembling to prevent tearing.
5. How long can I store assembled roll-ups in the fridge before cooking?
You can assemble the roll-ups a day ahead, keep them covered in the fridge, then sear when ready.
6. How do I know when the roll-ups are properly seared?
Sear until the outside is golden and crisp, about 2-3 minutes per side on medium heat.
7. What should the finished texture look and feel like?
Look for a golden-brown exterior with a slight sheen from searing oil and a warm, melty interior.
8. What if the roll-ups fall apart while cooking?
If the filling is oozing out or the outside is burnt, reduce the heat and sear for less time.
9. How long should I let the roll-ups rest after cooking?
Let them rest for a minute after searing to help the filling set and avoid spilling.
10. How do I reheat leftovers without drying them out?
Reheat gently in the oven or microwave, checking that they’re warmed through and cheese is melty.
These turkey roll ups are more than just a way to use leftovers; they’re a small act of kitchen rebellion, turning tired turkey into something lively and satisfying. The warm, melty cheese, the crunch of fresh herbs, and that hint of lemon brighten even the dullest fridge find.
When you make these, it’s a reminder that good food doesn’t need fancy ingredients or complicated techniques. Sometimes, it’s about keeping things honest, quick, and a little bit playful—like a secret tucked inside a tasty wrap. They’re perfect for busy nights or when you just need a little comfort in a handheld form.

Hi, I’m Madison Greene, the creator behind Texture Obsessed. If you have ever fallen in love with the crunch of a perfectly toasted crust, the silkiness of a smooth custard, or the contrast between crispy and creamy in a single bite, then you already understand what inspires me.

