
Getting that perfect sear on salmon isn’t just about high heat and good timing; it’s about understanding the delicate dance between pan temperature and cook time. Too hot, and you risk burning the skin or drying out the flesh. Too cool, and it won’t develop that crisp, caramelized exterior that makes this dish so satisfying.
I’ve spent years experimenting, trying to lock in that moist, flaky interior while achieving a beautifully crisp skin that crackles under the fork. It’s a surprisingly forgiving process once you get the rhythm down—once you master the timing, every piece feels like a small victory. This isn’t just cooking; it’s a quiet, almost meditative act of precision and patience.
Focusing on the importance of timing and pan temperature to achieve the perfect sear and moist, flaky flesh, highlighting the often overlooked details that make or break a pan seared salmon.
The dance of heat and time
- Seared salmon reminds me of weekends at the coast, where the smell of brine and fish fills the air.
- Getting that perfect crispy skin still feels like a small miracle after years of messing up in the kitchen.
- I love the moment when the fish releases easily from the pan, revealing that flawless, golden crust.
- Nothing beats the quiet satisfaction of a meal that’s simple but executed with care and patience.
The story behind this recipe
This recipe was born out of a quiet weekend craving a straightforward, satisfying fish dish that didn’t require fussing. I remember the first time I tried to sear salmon perfectly—burnt skin, undercooked middle, frustration. Over time, I realized it’s about respecting the fish’s delicate nature and trusting that simple techniques can bring out the best in it. Now, this pan seared salmon is my go-to when I want something quick, honest, and full of flavor, with that irresistible crispy skin every time.
Contextual origin, trivia, or history
- Pan searing as a technique dates back to ancient cooking methods where direct heat was used to quickly cook and crisp foods.
- Salmon has been a prized fish in Nordic and Pacific cultures for centuries, often seared over open flames or hot stones.
- The modern technique of pan searing gained popularity in French cuisine before becoming a staple in home kitchens worldwide.
- Achieving the perfect sear on fish was once considered a skill reserved for professional chefs, but now it’s a common household trick.
- The crispy skin of seared salmon not only adds texture but also acts as a barrier to keep the flesh moist during cooking.
Key ingredients for a perfect sear
- Salmon fillet: I prefer skin-on for that crispy texture, but make sure it’s dry—moisture is the enemy of crispness. Pat it well before hitting the pan.
- Salt: I season generously to enhance the natural flavor. Don’t be shy—salting just before searing helps draw out moisture and crisp the skin.
- Oil: Use a high-smoke-point oil like clarified butter or avocado oil. It crackles when hot and helps develop a golden crust without burning.
- Lemon: A squeeze of bright, zesty lemon right after searing lifts the richness of the fish. Skip if you’re not into citrus, but it’s a game-changer.
- Herbs (optional): Fresh thyme or dill can add a fragrant touch. Add them during the last minute for a subtle, aromatic boost—don’t overdo it.
- Pan: A heavy, non-stick or cast-iron skillet works best. It retains heat evenly and gives you that perfect sear with less sticking or burning.
- Additional flavor: A touch of garlic or shallots in the oil can add a delicate depth. Just crush and toss in at the start—watch for the aroma to bloom.
Spotlight on key ingredients
Salmon fillet:
- Salmon: I prefer skin-on for that crispy texture, but make sure it’s dry—moisture is the enemy of crispness. Pat it well before hitting the pan.
- Salt: I season generously to enhance the natural flavor. Don’t be shy—salting just before searing helps draw out moisture and crisp the skin.
- Oil: Use a high-smoke-point oil like clarified butter or avocado oil. It crackles when hot and helps develop a golden crust without burning.
Lemon and herbs:
- Lemon: A squeeze of bright, zesty lemon right after searing lifts the richness of the fish. Skip if you’re not into citrus, but it’s a game-changer.
- Herbs (optional): Fresh thyme or dill can add a fragrant touch. Add them during the last minute for a subtle, aromatic boost—don’t overdo it.
- Pan: A heavy, non-stick or cast-iron skillet works best. It retains heat evenly and gives you that perfect sear with less sticking or burning.
Notes for ingredient swaps
- Dairy-Free: Skip butter for oil; it won’t add that rich, slightly nutty aroma, but the sear still works.
- Low-Sodium: Use less salt or a salt substitute; the fish might taste a bit milder, so adjust accordingly.
- Citrus Variations: Lime or orange zest can replace lemon for a different bright, zingy note—experiment with what you have.
- Oil Choices: Swap avocado oil for grapeseed or light olive oil; just watch the smoke point and flavor impact.
- Herb Freshness: Dried thyme or dill can substitute fresh, but they won’t have that vibrant aroma—add earlier in cooking.
- Fish Type: Thicker fillets like Arctic char or trout can be used; they might need a minute or two longer for doneness.
- Flavor Boost: A splash of white wine or vermouth in the pan adds depth—just keep it to a tablespoon for balance.
Equipment & Tools
- Heavy skillet (cast iron/non-stick): Provides even heat for a crisp sear.
- Tongs: For flipping and handling the fish gently.
- Spatula: To lift and turn the fillet with care.
- Paper towels: Drying the fish to ensure crispness.
Step-by-step guide to pan searing
- Equipment & Tools: Grab a heavy skillet—preferably cast iron or non-stick—so heat distributes evenly. Tongs for flipping, a spatula for finesse, and a paper towel for drying the fish are essential.
- Pat the salmon dry with paper towels—moisture is the enemy of a crisp skin. Season generously with salt on both sides, especially on the skin.
- Heat the skillet over medium-high heat—around 200°C/390°F—until it just starts to shimmer. Add a splash of high-smoke-point oil, like avocado or clarified butter.
- Carefully place the salmon skin-side down—lay it away from you to avoid splatter—and press lightly for 10 seconds to prevent curling. Cook without moving for 4–5 minutes, until the skin is golden and crispy.
- Check the color—if the skin has turned deep amber and releases easily, it’s ready to flip. Use tongs or a spatula to turn the fillet gently.
- Cook the flesh side for 2–3 minutes—look for opaque edges and a slight jiggle in the center. If you prefer well-done, extend by another minute, but avoid overcooking.
- For extra flavor, add a squeeze of lemon and a sprig of herbs during the last minute of cooking. The smell should be bright and fragrant.
- Remove the salmon from the pan and let it rest on a plate for 2 minutes—this helps the juices redistribute and keeps it moist.
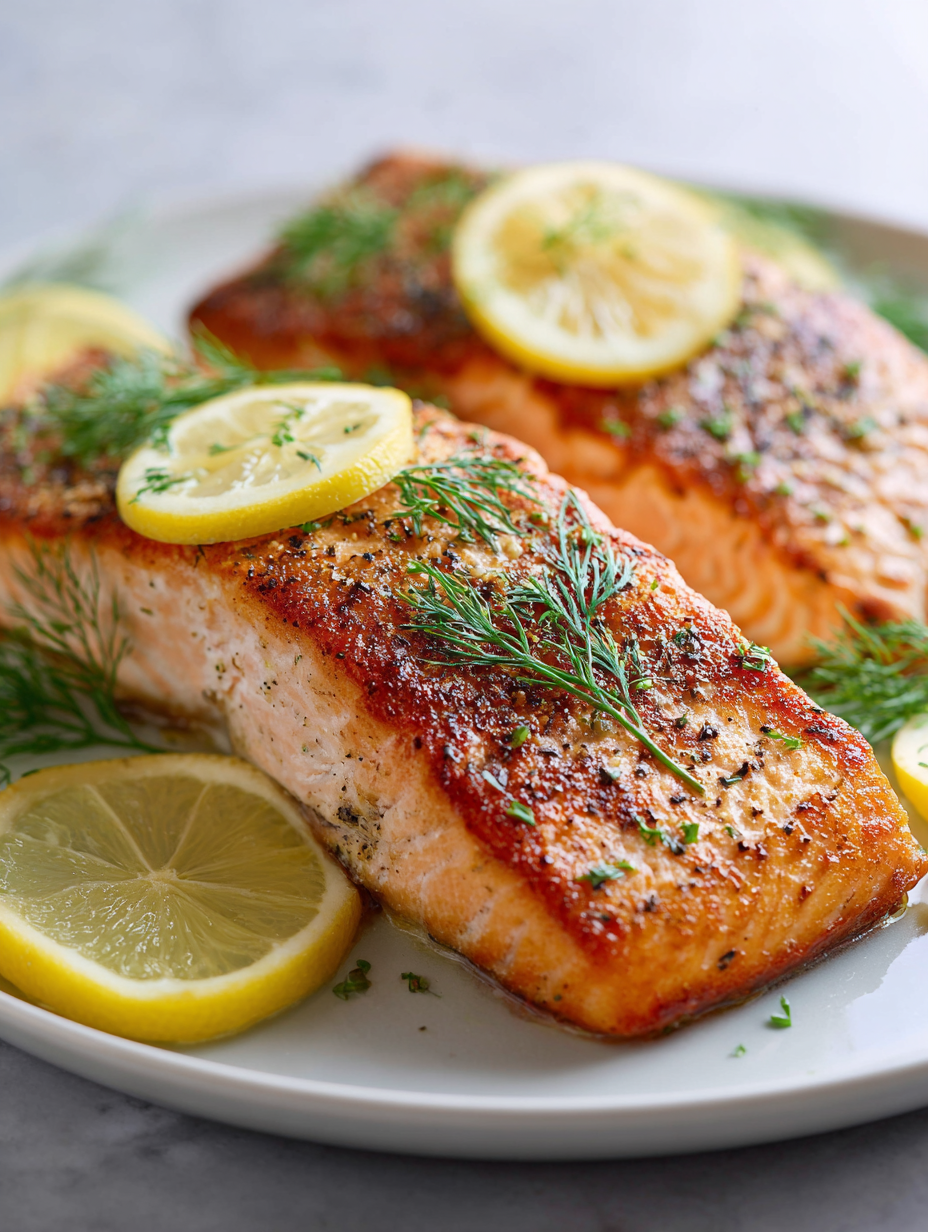
- Plate the fillet skin-up or skin-down, drizzle with more lemon if desired, and serve immediately. The skin should be crackly and flesh moist and flaky.
Rest the salmon on a plate for 2 minutes, skin side up. Finish with a squeeze of lemon and a sprinkle of herbs if desired. Serve immediately to enjoy the crisp skin and tender flesh at their best.
How to Know It’s Done
- Golden, crispy skin that crackles when pressed.
- Flesh is opaque and flakes easily with a fork.
- Internal temperature reaches 52–55°C/125–130°F for medium doneness.
Perfect Pan-Seared Salmon
Ingredients
Equipment
Method
- Pat the salmon fillets thoroughly dry with paper towels to remove excess moisture, which helps achieve a crisp skin.
- Season both sides generously with salt, pressing it into the flesh and especially onto the skin to enhance flavor and aid crisping.
- Heat your heavy skillet over medium-high heat until it just starts to shimmer, indicating it's hot enough for searing.
- Add a tablespoon of high-smoke-point oil and swirl to coat the bottom evenly, listening for a gentle crackle as it heats.
- Carefully place the salmon fillet skin-side down, laying it away from you to prevent splatter, and press gently for 10 seconds to ensure contact and prevent curling.
- Cook without moving the fish for about 4–5 minutes, watching the skin turn a deep golden brown and release easily from the pan when ready to flip.
- Using tongs or a spatula, gently flip the fillet and cook the flesh side for another 2–3 minutes, until the fish is opaque around the edges and flakes easily.
- If desired, add fresh herbs and a squeeze of lemon during the last minute of cooking for aromatic brightness.
- Remove the salmon from the pan and let it rest on a plate for 2 minutes, allowing the juices to redistribute and ensuring maximum moistness.
- Squeeze fresh lemon over the fillet, serve immediately, and enjoy the crackling skin paired with tender, flaky flesh.
Tips for a perfect sear
- Bolded mini-head: Dry the salmon skin thoroughly with paper towels to maximize crispiness.
- Bolded mini-head: Use a high-smoke-point oil, like avocado or clarified butter, for a crackling sear.
- Bolded mini-head: Press the fish gently into the pan for the first 10 seconds to prevent curling.
- Bolded mini-head: Don’t move the salmon too early; wait until the skin releases easily and is golden.
- Bolded mini-head: Finish with a squeeze of lemon for bright flavor and to cut through the richness.
- Bolded mini-head: Rest the cooked salmon for 2 minutes to allow juices to settle, keeping it moist.
- Bolded mini-head: Ensure the pan is hot enough—around 200°C/390°F—before adding the fish to prevent sticking.
Common mistakes and how to fix them
- FORGOT to dry the salmon skin → Pat thoroughly to ensure crispness.
- DUMPED oil into the pan → Use just enough to coat the surface lightly.
- OVER-TORCHED the fish → Adjust heat if smoke or burning occurs, lower heat slightly.
- UNDER-SEARED due to cold pan → Preheat pan until shimmering before adding fish.
Quick fixes and pantry swaps
- When skin sticks, splash cold water to loosen it quickly.
- If salmon appears dull, pat with lemon juice for a bright finish.
- DUMPED too much oil? Wipe excess with a paper towel before flipping.
- When pan smokes excessively, shield with a lid to contain splatter.
- Splash a bit of vinegar into the pan if the fish is overcooked—brings back moisture.
Prep, store, and reheat tips
- Prep the salmon by patting it dry and seasoning it thoroughly—do this up to an hour ahead for best skin crispness.
- Store the seasoned fillet uncovered in the fridge for up to 24 hours; the skin dries out slightly, aiding crispiness during searing.
- Refrigerated salmon will develop a slightly firmer texture; bring to room temperature for 10 minutes before cooking for even searing.
- Cooked salmon can be stored in an airtight container in the fridge for up to 2 days. The skin will lose some crunch but remains tender and flavorful.
- Reheat gently in a hot skillet or under a broiler for about 2 minutes—look for a crackling sound and a warm, flaky interior.
Top questions about pan seared salmon
1. How hot should the pan be for searing?
A hot pan (around 200°C/390°F) ensures a crispy skin and prevents sticking, but if it smokes excessively, lower the heat slightly.
2. Should I dry the salmon before cooking?
Pat the salmon dry with paper towels before seasoning. Moisture causes steaming, which hinders crisping.
3. What oil is best for searing salmon?
Use a high-smoke-point oil like avocado or clarified butter to avoid burning and get a good sear.
4. How do I prevent the salmon skin from curling?
Place the fish skin-side down gently and press lightly for 10 seconds to prevent curling and ensure contact.
5. How do I know when the skin is crispy enough to flip?
Cook the salmon until the skin is deep golden and releases easily—about 4–5 minutes—then flip carefully.
6. Should I rest the salmon after cooking?
Allow the cooked salmon to rest for 2 minutes before serving; this redistributes juices and keeps it moist.
7. What’s the ideal internal temperature for seared salmon?
Check for an internal temperature of 52–55°C/125–130°F for medium doneness, and ensure the flesh flakes easily.
8. What if the skin sticks to the pan?
If the skin sticks, splash cold water on it to loosen, or gently wiggle the fish with tongs.
9. Should I add lemon during or after cooking?
A squeeze of fresh lemon right after searing brightens flavors and balances the richness of the fish.
10. How should I store and reheat leftover salmon?
Store leftovers covered in the fridge for up to 2 days; reheat gently in a hot skillet for best texture.
Mastering pan seared salmon is about respecting its delicate nature and paying attention to tiny details. Once you get that crispy skin and flaky flesh right, it’s a simple pleasure that feels like a small victory every time.
Right now, with fresh salmon in season and a craving for honest, straightforward cooking, this recipe offers a way to enjoy something rich and satisfying without fuss. It’s a reminder that good food often comes down to patience, timing, and a little bit of heat control.

Hi, I’m Madison Greene, the creator behind Texture Obsessed. If you have ever fallen in love with the crunch of a perfectly toasted crust, the silkiness of a smooth custard, or the contrast between crispy and creamy in a single bite, then you already understand what inspires me.

