Halloween isn’t just about costumes and candy; it’s about embracing the eerie, the strange, and the delightfully creepy. What better way to tap into that spirit than with cookies that look like tiny, sinister fingers peeking from your treat bowl? These Witch Finger Cookies turn a simple sugar cookie dough into miniature phalanges, complete with gnarly knuckles and a touch of bloody icing.
As I knead the dough, I love imagining what kind of witch or goblin might have left these behind. The smell of almond extract mingling with butter instantly stirs childhood memories of crafting holiday treats that feel almost too spooky to eat. Each finger, cracked and veiny, adds a bizarre charm that makes Halloween baking so much fun.
Witch Finger Cookies
Ingredients
Equipment
Method
- Cream the softened butter and granulated sugar together in a mixing bowl until light and fluffy, about 2-3 minutes, and the mixture is pale in color.
- Beat in the egg and almond extract until combined, ensuring the mixture is smooth and uniform.
- In a separate bowl, whisk together the flour, baking powder, and salt. Gradually add this dry mixture to the wet ingredients, mixing slowly until a firm dough forms.
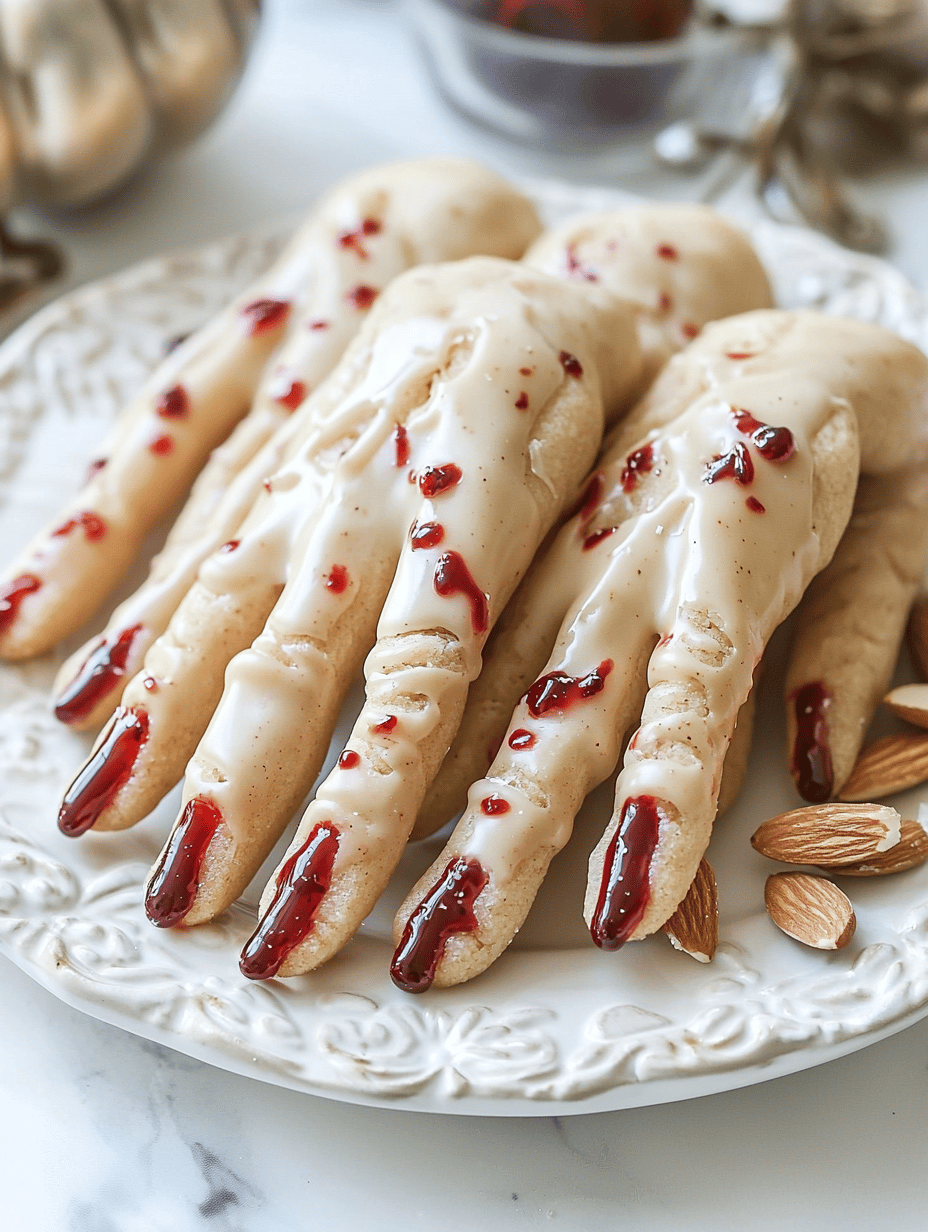
- Divide the dough into 12 equal portions and roll each into a long, finger-like shape about 4 inches long. Slightly taper the ends and add knuckle bumps by gently pressing to create rounded joints.
- Place the shaped fingers on a baking sheet lined with parchment paper, spacing them apart to allow for expansion.
- Mix the egg white with a few drops of water and brush gently over each finger to give a slight glaze that helps create a cracked, veiny appearance in baking.
- Bake in a preheated oven at 350°F (175°C) for about 12-15 minutes, or until the cookies are lightly golden and cracked. As they bake, the edges should become crisp and the cracks more defined.
- Remove the cookies from the oven and let them cool on a wire rack until completely firm.
- Once cooled, pipe or spread red icing sugar mixture at the knuckles for a bloody effect, and add lines of red food coloring across the cracked surfaces for veiny details.
- For a more realistic look, press almond-shaped almonds or similar small candies at the tips if desired.
- Serve these creepy cookies on a platter and watch them terrify your guests with their realistic, sinister appearance!
Notes
These Witch Finger Cookies capture the spooky charm of Halloween with minimal fuss. They’re perfect for parties, neighborhood gatherings, or a cheeky midnight snack while binge-watching horror flicks. The combination of soft cookie, crisp edges, and gory details make each bite both fun and a little creepy.
As you carve and decorate, remember this isn’t just about the sweets. It’s about creating moments of chaos and giggles, even among the pumpkin faces and graveyard treats. This year, let your kitchen turn into a haunted house of flavor, one eerily delicious finger at a time.

Hi, I’m Madison Greene, the creator behind Texture Obsessed. If you have ever fallen in love with the crunch of a perfectly toasted crust, the silkiness of a smooth custard, or the contrast between crispy and creamy in a single bite, then you already understand what inspires me.

