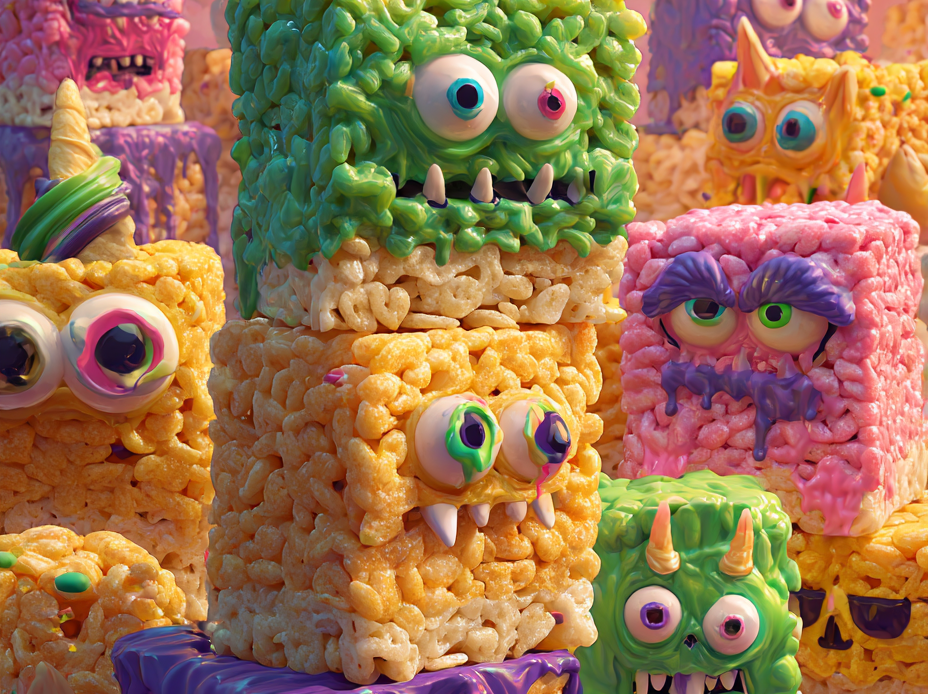
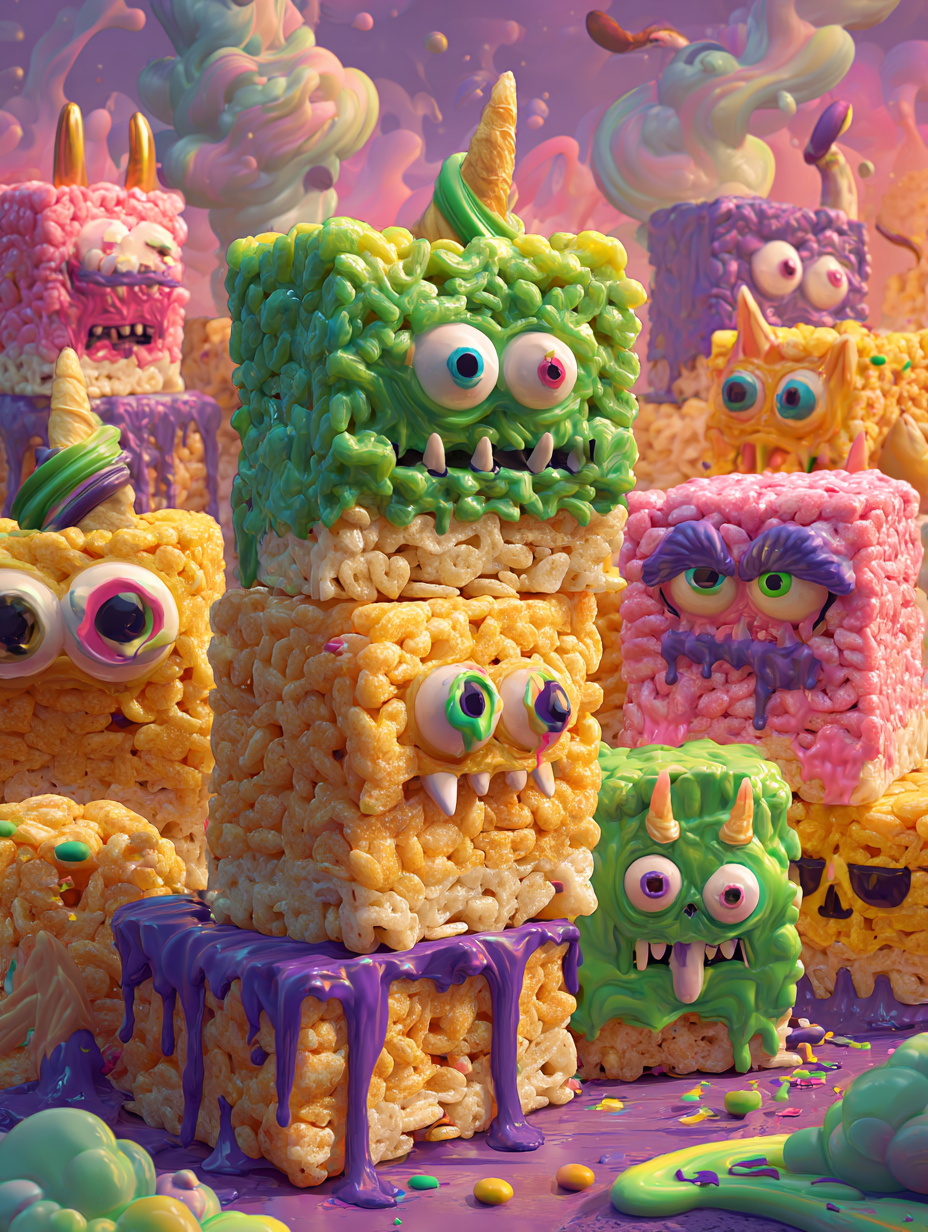
I’ve always loved rice krispie treats, but I wanted to shake things up—make them more daring, more textured. These monster treats are a little wild, a little unpredictable, but still rooted in that familiar crunch and sweetness. They’re perfect for a party or just a lazy weekend craving.
What makes them different? I add a touch of smoky spice and extra chewy marshmallows, which give them a complex flavor and a chewy bite. It’s a messy process, but that’s part of the charm—these treats embrace imperfection and invite creativity.
Why I Keep Coming Back to These Monster Treats
They’re forgiving and adaptable, perfect for last-minute cravings or creative experiments. The messy, lumpy look reminds me that food doesn’t need to be perfect—just flavorful and fun. I love how the smoky spice hints at something more complex than a simple childhood snack.
Breaking Down the Ingredients
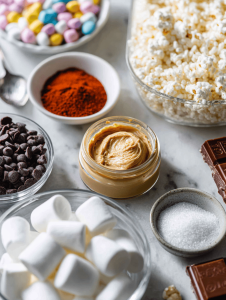
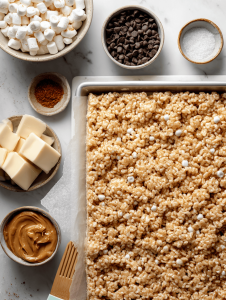
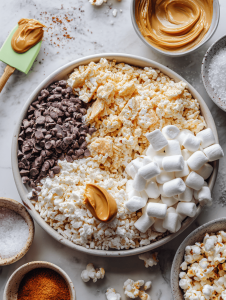
- Marshmallows: They melt into a gooey, sweet base. Use mini marshmallows for extra fluffiness—stale marshmallows won’t melt well.
- Butter: Gives richness and helps everything stick together. Salted butter adds a subtle savory note—unsalted works fine too.
- Crispy rice cereal: The core crunch. Try different brands for varied texture and flavor.
- Dark chocolate chips: For a rich, velvety layer—melt and swirl in for a decadent twist.
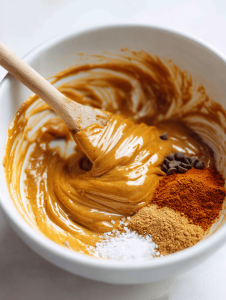
- Smoked paprika: A tiny pinch adds a smoky depth—be careful, it’s potent.
- Sea salt: Enhances sweetness and adds contrast.
- Peanut butter (optional): Stirred in for creaminess and a nutty kick.
Tools of the Trade for Monster Rice Krispie Treats
- Large saucepan: To melt butter and marshmallows evenly.
- Rubber spatula: Stirring and folding the mixture smoothly.
- 9×13 inch baking pan: Holding the mixture while it sets.
- Wax paper or greased spatula: Pressing the mixture evenly into the pan.
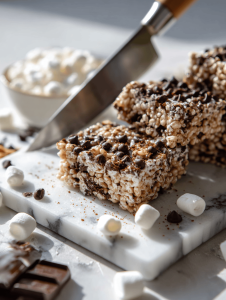
- Sharp knife or cookie cutter: Cutting or shaping the treats.
Step-by-Step to Monster Crispy Goodness
Step 1: Gather your ingredients and equipment before you start. This keeps the process smooth and stress-free.
Step 2: Melt the butter and marshmallows over low heat, stirring constantly. Keep an eye on them so they don’t burn or stick.
Step 3: Once smooth and glossy, remove from heat and quickly fold in the crispy rice cereal. Make sure every bit is coated.
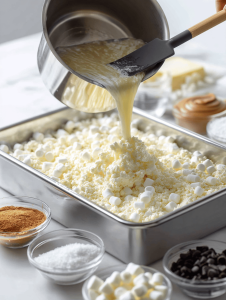
Step 4: Press the mixture into a greased pan, using the back of a spatula or wax paper to flatten. Don’t press too hard, or the treats get dense.
Step 5: Let them cool at room temperature for at least 30 minutes. They need to set, but not get hard.
Step 6: Cut into squares or monster shapes, depending on your mood. Enjoy at room temp for the best chew.
Crispy Treats Checklist and Tips
- The marshmallow mixture should be glossy and smooth, not grainy or separated.
- Your pan should be well-greased or lined for easy removal.
- Press firmly but gently when flattening; too much pressure makes them dense.
- Ensure they are cooled completely before cutting to prevent crumbling.
Common Mistakes and How to Fix Them
- Burned marshmallow mixture.? Use low heat; high heat burns the marshmallows.
- Over-pressed and compacted treats.? Don’t press too hard; dense treats are tough.
- Treats falling apart when sliced.? Cool completely before cutting to avoid crumbling.
- Flat taste, missing depth.? Add a splash of vanilla or a pinch of salt to balance flavors.
Monster Rice Krispie Treats
Ingredients
Equipment
Method
- Gather all your ingredients and equipment so you're ready to go, with everything within reach.
- Melt the butter in a large saucepan over low heat, listening for a gentle sizzle and watching it melt into a glossy pool.
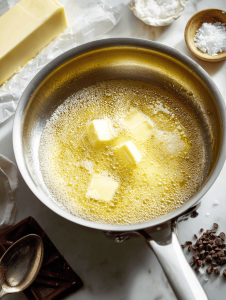
- Add the mini marshmallows to the melted butter and stir constantly with a rubber spatula. Continue until the marshmallows are completely melted, glossy, and bubbly, filling the air with a sweet, toasted aroma.
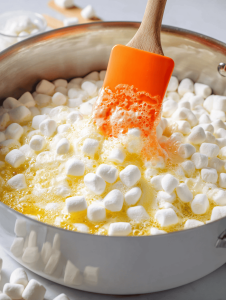
- Remove the mixture from heat and quickly fold in the rice crispy cereal, stirring gently until every piece is coated in the gooey marshmallow mixture.
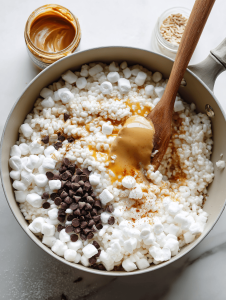
- Stir in the smoked paprika, sea salt, and peanut butter for added flavor and depth, mixing until well combined and fragrant.
- Pour the mixture into a greased 9x13 inch pan, then press it evenly with the back of a spatula or a sheet of wax paper. Don’t press too hard—just enough to make it compact but still lumpy and textured.
- Sprinkle the dark chocolate chips over the top, pressing them gently into the surface for a decadent swirl.
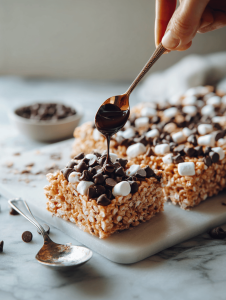
- Let the treats cool at room temperature for about 30 minutes, until they are set but still chewy. This helps prevent crumbling when cutting.
- Once cooled, use a sharp knife or cookie cutter to cut into squares or fun monster shapes. The treats should be lumpy and textured, with a satisfying crunch and chew.
- Arrange on a platter and enjoy these bold, messy, and irresistibly fun monster treats with friends or family!
Notes

Hi, I’m Madison Greene, the creator behind Texture Obsessed. If you have ever fallen in love with the crunch of a perfectly toasted crust, the silkiness of a smooth custard, or the contrast between crispy and creamy in a single bite, then you already understand what inspires me.

