Making Halloween cake pops isn’t just about the final look; it’s about the chaos and joy of transforming simple ingredients into miniature monsters. There’s a certain thrill in dipping, decorating, and watching a pile of crumbs turn spooky and festive. It’s a messy, colorful process that’s perfect for getting into the seasonal spirit.
Why These Halloween Cake Pops Keep Calling Me Back
They’re a playful way to celebrate the season, mixing chaos with creativity. Each batch is a mini adventure, from melting chocolate to decorating tiny monsters. Plus, they’re just the right size for sharing—no need to overindulge.
What’s in These Spooky Sweets? A Breakdown
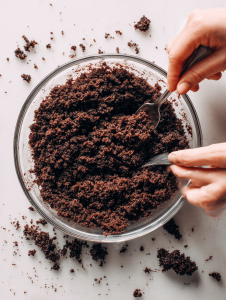
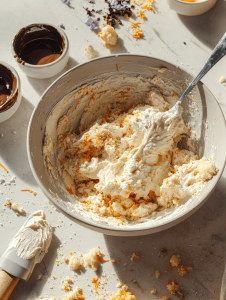
- Cake crumbs: Use leftover cake or baked sponge, crumbled fine. Adds sweetness and structure.
- Cream cheese or frosting: Bind the crumbs. Cream cheese gives a rich, tangy contrast.
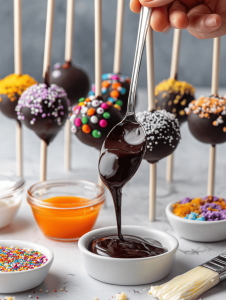
- Chocolate for coating: Dark, milk, or white—whatever sets the mood. Melts smoothly and covers well.
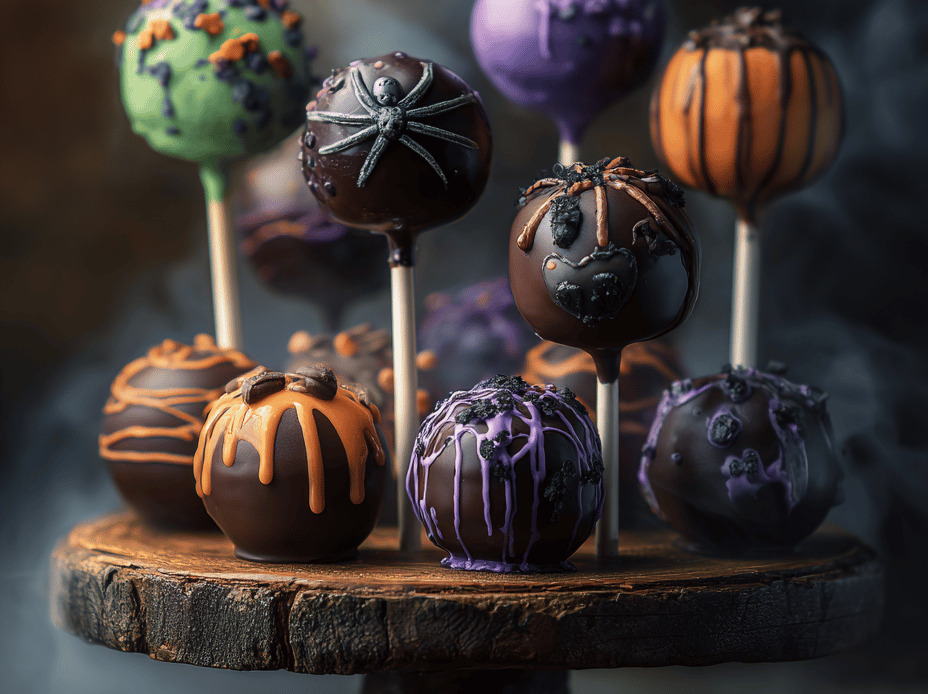
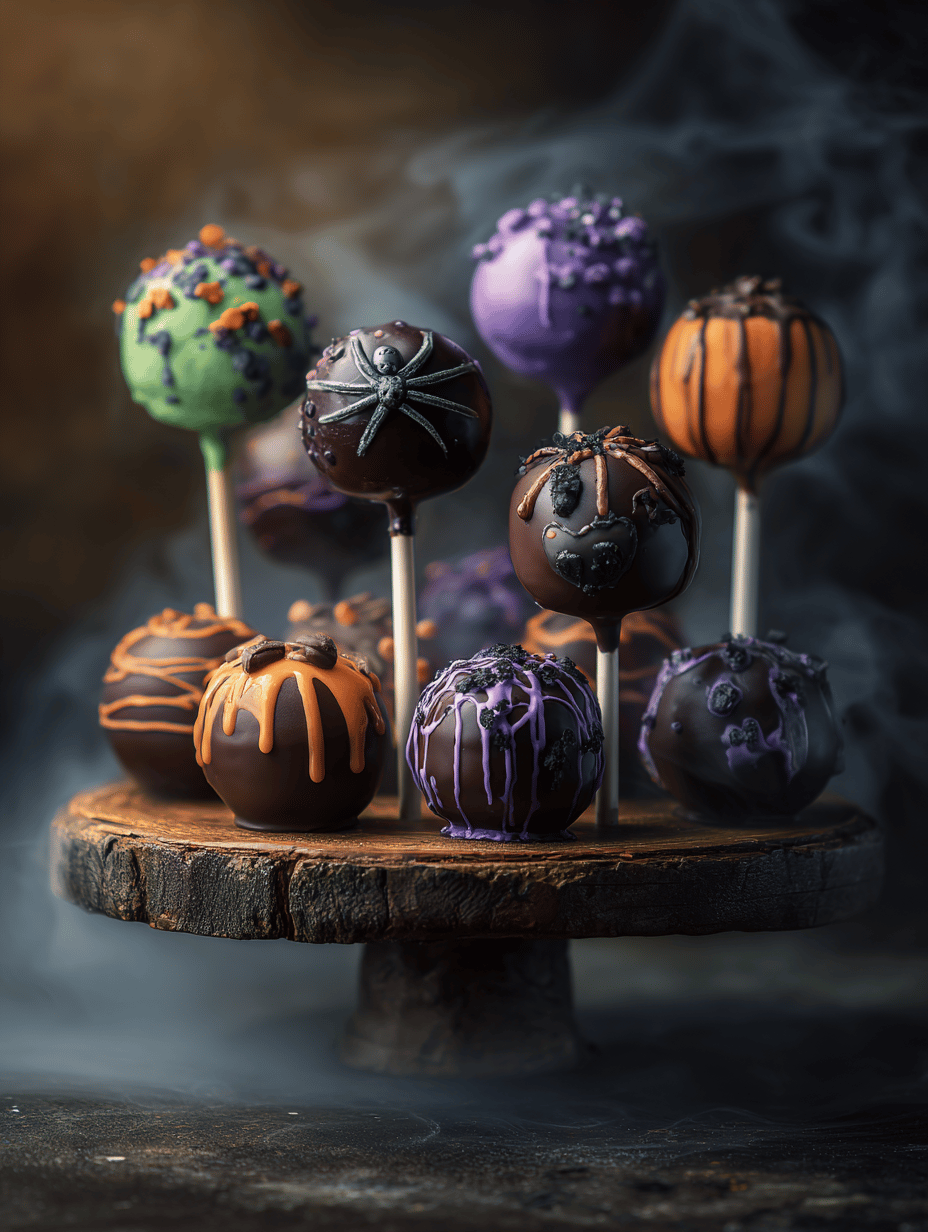
- Decorative icing and sprinkles: Edible glitter, googly eyes, or spooky shapes. Bring your monsters to life.
- Lollipop sticks: Support your pops and make decorating easier.
- Food coloring and edible ink: Color your coatings or draw tiny ghostly faces or spiders.
- Sprinkles and edible glitter: Add shimmer and texture—think shimmering cobwebs or fiery eyes.
Tools of the Trade for Spooky Creations
- Double boiler or microwave: Melts chocolate gently without burning.
- Silicone spatula: Stirs and smooths melted chocolate.
- Lollipop sticks: Supports the cake balls for dipping and decorating.
- Parchment paper: Prevents sticking and makes cleanup easier.
- Small piping bags or squeeze bottles: Adds fine details and designs.
Crafting the Perfect Spooky Bite: Step-by-Step
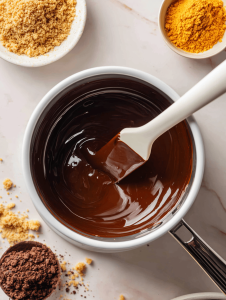
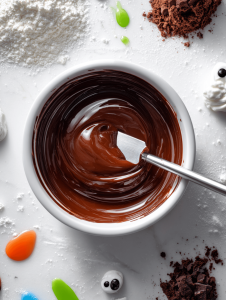
Step 1: Start by melting your chocolate over a double boiler or microwave in short bursts. Stir until smooth and glossy.
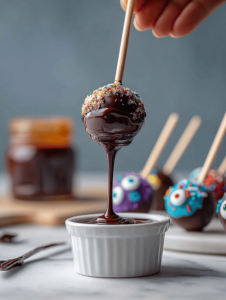
Step 2: Dip your cake balls into the melted chocolate, then gently tap off excess. Insert a lollipop stick into each and place on parchment.
Step 3: Chill the pops in the fridge for at least 30 minutes until firm.
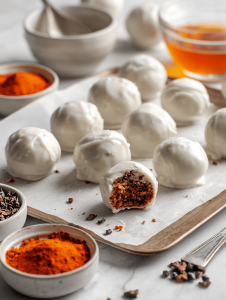
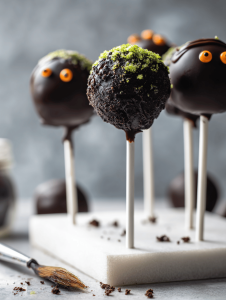
Step 4: Decorate with icing, sprinkles, or edible glitter to give your cake pops their spooky flair.
Step 5: Let the decorations set for 15 minutes before serving to avoid smudging.
Top Tips to Nail Your Halloween Cake Pops
- Make sure your cake crumbs are not too moist; dry crumbs stick better to the coating.
- Chill your cake balls before dipping to prevent cracking in the chocolate.
- Use a clean, dry brush to add extra details like spider webs or ghostly faces.
- Avoid over-heating the chocolate; it can seize or become grainy. Temper carefully.
- Let the chocolate cool slightly before dipping for a smoother finish.
Avoid These Common Halloween Cake Pop Fails
- Cake mixture too cold and crumbly.? FROZEN CAKE MIXTURE? Let it thaw slightly for easier shaping.
- Chocolate coating is too thick and drips.? Over-dipped? Use a toothpick to remove excess chocolate.
- Chocolate cracks or flakes.? Cracks in coating? Slightly reheat the chocolate or add a teaspoon of vegetable oil.
- Decorations don’t stick or fall off.? Decorations falling off? Use a bit of water or edible glue to set details.
Halloween Cake Pops
Ingredients
Equipment
Method
- Combine the cake crumbs and cream cheese or frosting in a mixing bowl, mixing thoroughly until the mixture is uniform and sticky.
- Scoop out small portions and roll them into smooth, round balls about the size of a golf ball.
- Insert a lollipop stick into each cake ball, pressing gently to secure, then place on a parchment-lined tray.
- Chill the cake pops in the refrigerator for at least 30 minutes until firm and chilled.

- Gently melt the chocolate using a double boiler or microwave in short bursts, stirring until smooth and glossy, and the aroma of melted chocolate fills the air.
- Dip each chilled cake pop into the melted chocolate, swirling gently to coat evenly, then tap off excess chocolate and place back on parchment paper.
- Decorate the coated cake pops immediately with icing, sprinkles, edible glitter, or draw faces with edible ink, creating spooky monsters and fun details.
- Allow the decorations to set for about 15 minutes at room temperature, ensuring everything sticks firmly and the coating firms up.
- Once set, your spooky Halloween cake pops are ready to serve—perfect for sharing and celebrating the season with a festive, colorful treat.
Notes

Hi, I’m Madison Greene, the creator behind Texture Obsessed. If you have ever fallen in love with the crunch of a perfectly toasted crust, the silkiness of a smooth custard, or the contrast between crispy and creamy in a single bite, then you already understand what inspires me.

