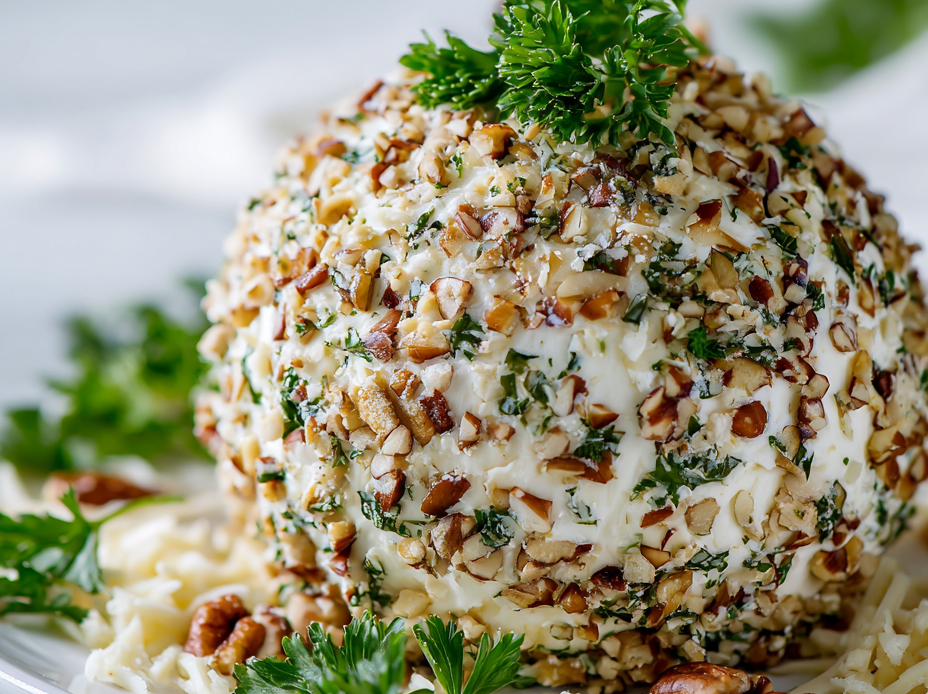
There’s something about a cheese ball that feels like a warm hug, even if it’s slapped together in a rush. It’s imperfect, a little rustic, and full of potential for customization—smoked paprika, chopped herbs, even a dash of hot sauce if you’re feeling bold. I love how it always feels like a little surprise at the table, no matter how many times I make it.
This recipe is about more than just cheese; it’s about gathering, sharing, and making something that’s straightforward but full of personality. It’s the kind of dish that invites everyone to dig in with their hands, to get a little messy, and to enjoy the simple pleasure of creamy, cheesy goodness. It’s comfort food in its most honest form, perfect for casual nights or spontaneous get-togethers.
Focusing on the nostalgic charm of a cheese ball as a centerpiece for casual gatherings, highlighting its imperfect, homemade feel and the joy of customizing flavors with unexpected ingredients like smoked paprika or chopped herbs.
Nostalgic Comfort in a Ball
- Making this cheese ball always takes me back to family picnics in the backyard, the smell of toasted buns and cold drinks filling the air.
- I used to get frustrated trying to perfect the shape, but now I embrace the rustic, slightly lopsided look—it’s part of its charm.
- There’s a thrill in customizing each batch—adding a pinch of hot sauce or chopped chives makes it uniquely mine every time.
The story behind this recipe
- This cheese ball recipe was born out of a cluttered kitchen and a weekend craving for something cheesy and nostalgic. I remember rummaging through the fridge, tossing together what I had—cream cheese, sharp cheddar, a splash of hot sauce. It turned out sticky, messy, but irresistibly good, sparking the idea to make it a proper recipe.
- The first time I served it at a casual gathering, I watched everyone’s hands eagerly digging in—messy, smiling, satisfied. That imperfect, homemade charm stuck with me. It’s a dish that’s all about improvising with what’s on hand and loving the unpolished, cozy results.
- heading: ‘The story behind this recipe’
Cheese ball trivia and history
- The cheese ball gained popularity in mid-20th-century America, often served at potlucks and church socials as a no-fuss appetizer.
- Originally, cheese balls were made with simple ingredients like cream cheese and nuts, evolving over time with regional flavor twists and creative add-ins.
- In the 1950s and 60s, the cheese ball became a symbol of casual entertaining, often decorated with dried fruits or chopped herbs to add visual flair.
- Some believe the cheese ball’s roots trace back to European cheese-based spreads, but its American version truly took off as a communal, shareable snack.
Ingredient breakdown: key components
- Cream cheese: I love how it becomes velvety soft when whipped—your hands will feel the richness as you mix. Swap with neufchâtel for a lighter, tangier note.
- Sharp cheddar: It adds that punch of savory depth, with a crumbly, slightly oily texture that melts in your mouth. Use smoked gouda if you want a smoky twist.
- Nuts (pecans or walnuts): I prefer to toast them lightly; the aroma is intoxicating and adds crunch. Almonds work too, but keep an eye on their gentle toasting time.
- Herbs (chives or parsley): Fresh herbs brighten the flavor with a mild onion or grassy note, and the vibrant green makes it look inviting. Dried herbs can work in a pinch but won’t deliver the same freshness.
- Hot sauce or spices: Just a dash can elevate the flavor—think smoky chipotle or a splash of sriracha. Add slowly, tasting as you go, for that perfect kick.
- Worcestershire or soy sauce: A tiny splash deepens the umami, making the cheese more complex. Use sparingly to avoid overpowering the cheese’s natural flavor.
- Breadcrumbs or crushed crackers: They help shape the ball and add a slight crunch on the outside. Panko gives a lighter crust, while crushed Ritz adds richness.
Spotlight on key ingredients
Cream cheese:
- I love how it becomes velvety soft when whipped—your hands will feel the richness as you mix. Swap with neufchâtel for a lighter, tangier note.
- Sharp cheddar: It adds that punch of savory depth, with a crumbly, slightly oily texture that melts in your mouth. Use smoked gouda if you want a smoky twist.
- Nuts (pecans or walnuts): I prefer to toast them lightly; the aroma is intoxicating and adds crunch. Almonds work too, but keep an eye on their gentle toasting time.
Herbs and Spices:
- Herbs (chives or parsley): Fresh herbs brighten the flavor with a mild onion or grassy note, and the vibrant green makes it look inviting. Dried herbs can work in a pinch but won’t deliver the same freshness.
- Hot sauce or spices: Just a dash can elevate the flavor—think smoky chipotle or a splash of sriracha. Add slowly, tasting as you go, for that perfect kick.
Notes for ingredient swaps
- Dairy-Free: Swap cream cheese for a vegan cream cheese alternative. It will be slightly less rich and creamier, but still tasty.
- Cheddar Cheese: Use Monterey Jack or Colby for a milder flavor, or smoked Gouda for a smoky twist that melts beautifully.
- Nuts: Substitute with roasted chickpeas or sunflower seeds for crunch, especially if nuts aren’t your thing or allergy concerns.
- Fresh Herbs: Dried herbs like thyme or basil can replace fresh, but use half the amount to avoid overpowering the cheese.
- Hot Sauce: Use a milder sriracha or a dash of smoked paprika if you want a gentler heat, or skip entirely for a milder version.
- Worcestershire Sauce: Soy sauce or tamari can add umami without the vinegar tang, especially if you prefer a gluten-free option.
- Crackers or Coating: Panko breadcrumbs give a light crunch, while crushed whole-grain crackers add a hearty, earthy flavor.
Equipment & Tools
- Large mixing bowl: Whip and combine ingredients.
- Grater: Shred cheese.
- Spatula: Mix and fold ingredients.
- Plastic wrap: Shape and chill the cheese ball.
- Plate or shallow dish: Coat the cheese ball.
- Knife or chopping board: Chop nuts and herbs.
Step-by-step guide to cheese ball
- Gather all ingredients: cream cheese, sharp cheddar, nuts, herbs, hot sauce, Worcestershire, crackers, and any extras. Have a baking sheet or platter ready for shaping.
- In a large mixing bowl, soften 16 oz (450 g) of cream cheese. Use a spatula or spoon to whip it until smooth and fluffy, about 2-3 minutes.
- Grate 1 cup (100 g) of sharp cheddar cheese. Mix it into the cream cheese along with 1/4 cup (30 g) of finely chopped herbs (like chives or parsley).
- Add 1 tablespoon (15 ml) of hot sauce and a teaspoon (5 ml) of Worcestershire sauce. Stir well to combine, tasting and adjusting for spice levels.
- Chop 1/2 cup (60 g) of toasted nuts (pecans or walnuts). Fold them into the cheese mixture, saving a few for rolling later.
- Line a plate with plastic wrap. Using your hands or a spatula, shape the cheese mixture into a rough ball, about 10 cm (4 inches) in diameter. Wrap tightly and chill for at least 1 hour.
- While chilling, crush crackers or additional nuts for coating. Spread on a plate or shallow dish.
- Once chilled, unwrap the cheese ball. Roll it gently in the crushed crackers or nuts until evenly coated. Refrain from pressing too hard to keep the coating light.
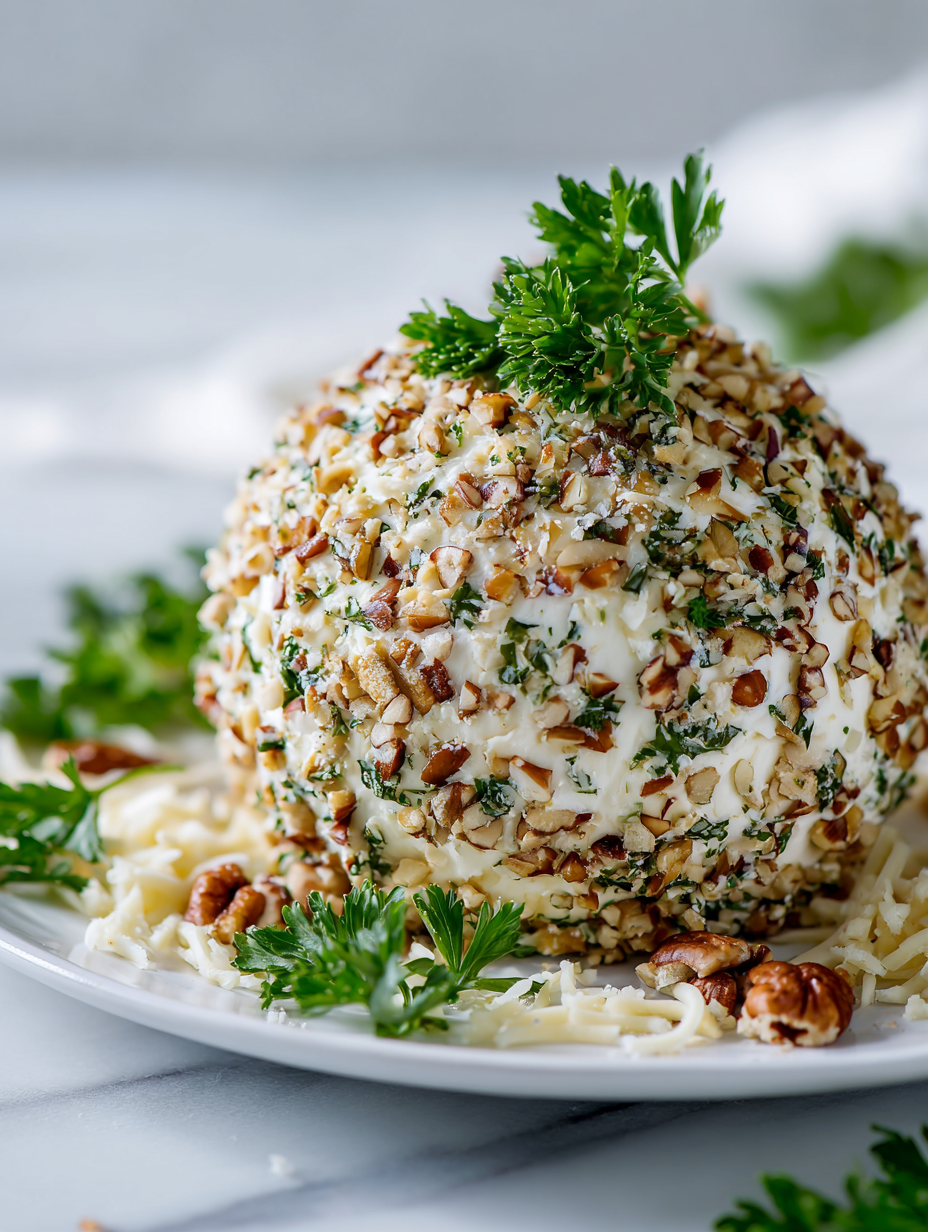
- Place the coated cheese ball on a serving platter. Garnish with extra herbs or nuts if desired. Let rest for 10 minutes at room temperature before serving.
Chill the cheese ball in the fridge for at least an hour to firm up. Before serving, let it sit at room temperature for 10 minutes to soften slightly and enhance flavor. Serve with crackers, sliced baguette, or fresh vegetables.
How to Know It’s Done
- Cheese ball feels firm but pliable when shaped.
- Coating sticks evenly without cracking or falling off.
- Surface has a slightly toasted, nutty appearance and aroma.
Classic Cheese Ball
Ingredients
Equipment
Method
- In a large mixing bowl, use a spatula to whip the softened cream cheese until smooth and fluffy, about 2-3 minutes. The mixture should be creamy and slightly aerated.
- Grate the sharp cheddar cheese and fold it into the cream cheese along with the chopped herbs, combining thoroughly with the spatula. The mixture will become speckled with green and yellow.
- Add the hot sauce and Worcestershire sauce to the mixture, then stir well. Taste and adjust the spice level if needed—this gives the cheese ball a flavorful kick.
- Chop the toasted nuts finely and gently fold them into the cheese mixture, reserving some for rolling later. This adds crunch and richness to the final dish.
- Line a plate with plastic wrap. Using your hands or a spatula, shape the mixture into a rough ball about 4 inches in diameter. Wrap tightly with plastic and refrigerate for at least 1 hour to firm up.
- Once chilled, unwrap the cheese ball and pour the crushed crackers or remaining nuts onto a shallow dish. Gently roll the cheese ball in the coating until evenly covered, pressing lightly to help it stick.
- Place the coated cheese ball on a serving platter. Garnish with extra herbs or nuts if desired, then let sit at room temperature for 10 minutes before serving to soften slightly and enhance flavor.
Pro tips for cheese ball perfection
- Bolded mini-head: Chill the mixture thoroughly → Ensures easier shaping and better flavor melding.
- Bolded mini-head: Toast nuts lightly → Enhances aroma and crunch, but avoid burning for a smoky bitterness.
- Bolded mini-head: Use room temperature ingredients → Mix becomes smoother and more cohesive, reducing lumps.
- Bolded mini-head: Roll firmly but gently → Creates an even coating without cracking or falling apart.
- Bolded mini-head: Chill before serving → Resting tightens the shape and deepens flavors, making it more cohesive.
- Bolded mini-head: Taste and adjust spices → A quick taste before shaping guarantees the right flavor punch.
- Bolded mini-head: Handle with clean hands or spatula → Keeps the mixture hygienic and prevents excess moisture.
Common mistakes and how to fix them
- FORGOT to fully chill the cheese ball → Chill for at least 1 hour before coating.
- DUMPED too much nuts into mixture → Fold in nuts gently, save some for coating.
- OVER-TORCHED the coating → Toast nuts lightly, watch closely for golden color.
- MISSED the texture test → Should feel firm but slightly pliable when shaped.
Quick fixes and pantry swaps
- When cheese cracks, splash a little warm milk to smooth the mixture.
- If coating falls off, patch with a light sprinkle of crushed nuts and press gently.
- Over-torched nuts? Shield with a damp towel and toast again carefully.
- Forgot to chill? DUMP the mixture back in the fridge for 30 minutes before shaping.
- When mixture is too soft, rescue by adding a handful of crushed crackers or bread crumbs.
Prep, store, and reheat tips
- You can prepare the cheese ball mixture a day in advance; keep it tightly wrapped in the fridge for up to 24 hours. The flavors meld better, and it firms up nicely, making shaping easier.
- Shape the cheese ball and coat it with nuts or crackers just before serving. Wrapped tightly in plastic, it stays fresh for up to 2 days in the fridge, but best enjoyed within 24 hours for optimal texture.
- Refrigerated cheese balls develop a firmer texture, so if you prefer it softer, let it sit at room temperature for 10-15 minutes before serving. The aroma of herbs and nuts intensifies as it warms.
- If storing leftovers, keep them covered tightly in the fridge for no more than 3 days. The flavor stays bright, but the coating may soften slightly, so re-roll in nuts or crackers if needed before serving.
Top questions about cheese balls
1. Should I use room temperature cream cheese?
Use softened cream cheese for easy mixing and a smooth texture. Cold cheese is harder to incorporate smoothly.
2. How long should I chill the cheese ball?
Chill the cheese ball for at least an hour to help it firm up and make shaping easier.
3. Can I substitute nuts in the recipe?
Replace nuts with crushed crackers or seeds if you’re allergic or want a different crunch. Toast nuts for extra flavor.
4. Can I add other cheeses to the mixture?
Yes, using shredded cheese adds flavor and texture. Mix it in with the cream cheese for a more intense cheese taste.
5. Should I use fresh or dried herbs?
Adding fresh herbs like chives or parsley brightens the flavor. Dried herbs work, but won’t be as vibrant or fresh.
6. My coating cracked after rolling—what now?
A quick fix for cracks in the coating is to press more crushed nuts or crackers onto the surface before serving.
7. What should I serve with the cheese ball?
Serve the cheese ball with crackers, sliced baguette, or veggie sticks for best presentation and flavor pairing.
8. The mixture is too soft—what can I do?
If the cheese mixture is too sticky, fold in a little crushed crackers or bread crumbs to firm it up.
9. How can I make it more smoky?
For a smoky flavor, add smoked paprika or use smoked cheese varieties in the mix.
10. How long can I keep the cheese ball?
Leftovers can be stored in an airtight container in the fridge for up to 3 days. Re-shape slightly before serving.
Making this cheese ball always feels like a little act of rebellion—messy, imperfect, but utterly satisfying. It’s funny how something so simple can bring such a messy, cheesy joy to the table.
In the end, it’s not just about the flavor; it’s about those moments of gathering, the unspoken comfort of sharing something homemade, and the small chaos that makes it memorable.

Hi, I’m Madison Greene, the creator behind Texture Obsessed. If you have ever fallen in love with the crunch of a perfectly toasted crust, the silkiness of a smooth custard, or the contrast between crispy and creamy in a single bite, then you already understand what inspires me.

