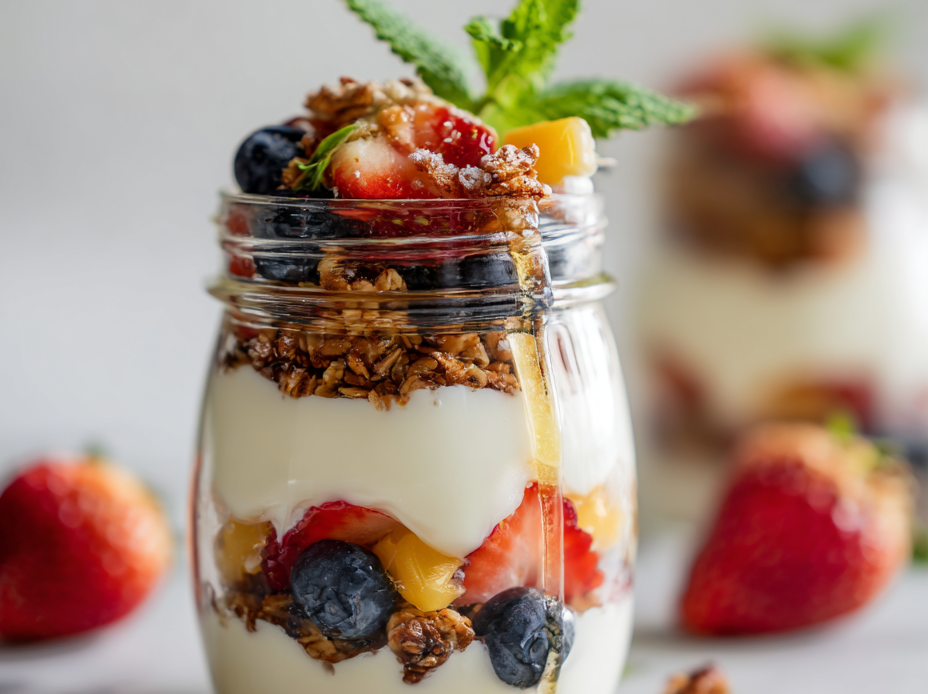
This yogurt snack jar is my go-to for those mornings when I need a quick, nourishing bite that feels a little special. It’s not just about the taste but the ritual—scooping out that creamy, tangy yogurt layered with fruit and crunch, all in one portable jar. It turns a simple snack into a small, delightful moment I actually look forward to.
What I love most is how adaptable it is—whatever fruit or nuts you have on hand, it can become your own little creation. Plus, it’s honestly a lifesaver when I’m rushing out the door or looking for a healthy treat that isn’t a hassle to prepare. Sometimes I even sneak in a drizzle of honey or a sprinkle of granola to make it feel like a tiny indulgence.
This recipe is all about turning a simple snack into a portable, customizable moment of joy—perfect for busy mornings or quick breaks, where the jar itself becomes part of the experience, blending practicality with a touch of personal flair.
The story behind this recipe
- This recipe was born out of a chaotic Sunday morning. I needed something quick, portable, but still felt like a treat. One day, I grabbed whatever yogurt and toppings I had—nuts, honey, some fruit—threw them into a jar, and it just clicked. That simple moment of improvisation turned into a go-to snack I actually look forward to. Now, it’s become my little ritual for busy days, a tiny bit of order in the chaos.
- I love how flexible it is—sometimes I toss in leftover berries, a handful of granola, or a splash of maple syrup. It’s as much about the process as the result—a quick assembly, a moment to pause. Plus, the jar itself makes it feel like a small, personal gift, even if it’s just for myself. It’s honest, unpolished, but reliable—my kind of snack.
- heading
- story_type
Component insights for your snack jar
- Greek yogurt: I love the thick, creamy texture of full-fat Greek yogurt—makes every spoon feel indulgent. Swap with regular yogurt if you prefer a lighter feel, but the texture will be less velvety.
- Fresh berries: Juicy, burst-in-mouth berries add a zing of brightness that elevates the whole jar. Frozen berries work in a pinch, just thaw and drain excess water first to avoid sogginess.
- Honey or maple syrup: A drizzle of honey adds a floral sweetness that balances the tang. Use less if you want more tartness; for a richer flavor, try agave or even a splash of vanilla syrup.
- Granola: I prefer a crunchy, honeyed granola—adds that satisfying crunch and aroma. If you’re gluten-free, opt for toasted nut clusters or seed mixes, which still give good crunch.
- Nuts: Toasted almonds or walnuts bring a smoky, warm note and crunch. Raw nuts are fine, but toasting them briefly in a pan heightens their aroma and flavor.
- Optional extras: Chia seeds or flaxseed add a bit of fiber and chewiness. Sprinkle on top for a delicate crunch or stir into the yogurt for a slightly gelled texture.
- Lemon zest or cinnamon: A tiny pinch of lemon zest brightens everything, while cinnamon adds warmth. Both are optional but can transform the flavor profile easily.
Spotlight on key ingredients
Greek yogurt:
- I love the thick, creamy texture of full-fat Greek yogurt—makes every spoon feel indulgent. Swap with regular yogurt if you prefer a lighter feel, but the texture will be less velvety.
- Fresh berries: Juicy, burst-in-mouth berries add a zing of brightness that elevates the whole jar. Frozen berries work in a pinch, just thaw and drain excess water first to avoid sogginess.
- Honey or maple syrup: A drizzle of honey adds a floral sweetness that balances the tang. Use less if you want more tartness; for a richer flavor, try agave or even a splash of vanilla syrup.
Granola and nuts:
- Granola: I prefer a crunchy, honeyed granola—adds that satisfying crunch and aroma. If you’re gluten-free, opt for toasted nut clusters or seed mixes, which still give good crunch.
- Nuts: Toasted almonds or walnuts bring a smoky, warm note and crunch. Raw nuts are fine, but toasting them briefly in a pan heightens their aroma and flavor.
- Optional extras: Chia seeds or flaxseed add a bit of fiber and chewiness. Sprinkle on top for a delicate crunch or stir into the yogurt for a slightly gelled texture.
Notes for ingredient swaps
- Dairy-Free: Use coconut or almond yogurt instead of dairy yogurt. It’s creamier than most plant-based options, but watch for added sugars.
- Sweeteners: Swap honey for maple syrup, agave, or coconut nectar. Each brings a different depth—try them all for variety.
- Crunchy Toppings: Oats or toasted sunflower seeds can replace granola if you want a lighter crunch or keep it nut-free.
- Fruits: Fresh or frozen berries work interchangeably, but frozen berries may add a bit of extra juice—thaw and drain well.
- Nuts: Raw or roasted almonds and walnuts are both good; roasting enhances aroma and crunch, but raw keeps it milder.
- Sweet Spices: Cinnamon or vanilla powder can be added in place of lemon zest for warm, cozy notes.
- Layering Bases: Chia pudding or ricotta can replace yogurt for a different texture and flavor profile, but adjust sweetness accordingly.
Equipment & Tools
- Small jar or container: To hold and layer the snack, portable and convenient.
- Spoon: For scooping, layering, and serving.
- Small knife: To slice fruit or chop toppings neatly.
- Lid: To seal the jar for storage or transport.
Step-by-step guide to yogurt snack jar
- Gather your equipment: a small jar or container with a lid, a spoon, and a small knife for slicing fruit.
- Layer the yogurt: spoon about half into the jar, smoothing it out for an even base. This takes about 1 minute.
- Add fruit: slice fresh berries or other fruits you like, and layer over the yogurt. Aim for a colorful layer, about 2-3 tablespoons per jar.
- Sprinkle toppings: add a handful of granola or nuts for crunch. Don’t skimp—it’s the texture that makes this special.
- Drizzle sweetener: honey, maple syrup, or agave—just a teaspoon or so. This balances the tang and adds gloss.
- Repeat layers: add the remaining yogurt, fruits, and toppings, creating a visual stack of textures and colors. Take your time for presentation.
- Seal the jar: screw on the lid tightly. Double-check that it’s secure to prevent leaks during transport.
- Rest briefly: let the jar sit for 5 minutes at room temperature if you want the flavors to meld slightly, or go straight to packing.
- Finish and pack: if serving later, store in the fridge. If eating immediately, give it a gentle shake or spoon to combine flavors before enjoying.
- Check for readiness: the yogurt should be creamy but not runny, the toppings crisp, and the layers distinct yet inviting.
Seal the jar tightly and store in the fridge if not eating immediately. For best flavor, consume within 24 hours. When ready, open and give a gentle stir or spoon to combine layers before enjoying.
How to Know It’s Done
- Yogurt is smooth and creamy, not watery or separated.
- Fruit is fresh, vibrant, and not mushy.
- Toppings are crisp and well-distributed, with a shiny drizzle of honey or syrup.
Yogurt Snack Jar
Ingredients
Equipment
Method
- Start by spooning half of the Greek yogurt into your small jar, smoothing it out with the back of the spoon to create an even base.
- Next, wash and slice your fresh berries if needed, then add a layer of 2-3 tablespoons over the yogurt, creating a vibrant, colorful band.
- Drizzle about a teaspoon of honey over the fruit layer for a gentle sweetness that glazes the berries.
- Add a tablespoon of crunchy granola on top of the honey to introduce a satisfying crunch and aroma.
- Sprinkle chopped toasted nuts over the granola for an added warm, smoky flavor and extra crunch.
- Repeat the layers by adding the remaining yogurt, then top with a few more berries and a final drizzle of honey if desired.
- Seal the jar tightly with the lid and give it a gentle shake or a quick stir to evenly distribute the ingredients if you prefer.
- Place in the fridge if not immediately enjoyed, or serve right away for a fresh, colorful, and crunchy snack.
Notes
Pro tips for perfect yogurt jars
- Bolded mini-head: Layer gently → Use a slow, deliberate hand when adding layers to keep the textures distinct and prevent mixing.
- Bolded mini-head: Chill before sealing → Let the jar sit in the fridge for 10 minutes after assembling to keep toppings crispy and yogurt cool.
- Bolded mini-head: Use ripe fruit → Choose berries and fruits that give slightly under pressure for juicy bursts and vibrant flavor.
- Bolded mini-head: Add honey last → Drizzle honey over the top after layering to prevent it from sinking and losing its shine.
- Bolded mini-head: Keep toppings separate → Store crunchy toppings separately if making ahead, add just before eating to maintain crunch.
- Bolded mini-head: Adjust sweetness → Taste the yogurt and fruit before sweetening; less is often more, so add gradually.
- Bolded mini-head: Use a wide-mouth jar → For easier layering and cleaning, which saves time and keeps layers neat.
Common mistakes and how to fix them
- FORGOT to check jar seal—leaks cause soggy toppings. Fix by tightening lid thoroughly.
- DUMPED all ingredients at once—layer slowly to prevent mixing and sogginess.
- OVER-TORCHED nuts—burnt flavor ruins the crunch. Toast at 180°C (350°F) just until golden.
- FAILED to drain excess liquid from frozen berries—water makes layers runny. Thaw, drain, and pat dry.
Quick fixes and pantry swaps
- If you forget to seal the jar, fix by tightening the lid quickly to prevent leaks.
- When toppings get soggy, splash a little extra honey or drizzle to revive crunch.
- Patch burnt nuts by quickly tossing them in a hot pan, then cool immediately to stop cooking.
- Shield layered jars from excess moisture by storing in airtight containers in the fridge.
- heading
Prep, store, and reheat tips
- Prep fruit and toppings ahead of time—slice berries or chop nuts the night before for quick assembly.
- Store yogurt in a sealed container in the fridge—keeps it fresh for up to 3 days without losing creaminess.
- Layered jars are best consumed within 24 hours; beyond that, toppings may soften or become soggy.
- Refrigerate assembled jars if not eaten immediately; for best texture, add crunchy toppings just before serving.
- To reheat, gently warm in a microwave for 10-15 seconds if desired, but the jar is usually best enjoyed cold with crisp toppings intact.
Top questions about Yogurt Snack Jar
1. Can I use regular yogurt instead of Greek yogurt?
Use full-fat Greek yogurt for that rich, creamy texture—less tangy than low-fat options, which can be more watery.
2. Can I use frozen fruit in this recipe?
Frozen berries work well; just thaw and drain excess water to keep layers neat and prevent sogginess.
3. Can I substitute honey with other sweeteners?
Yes! Swap honey with maple syrup or agave for different sweetness notes—each brings a unique flavor profile.
4. How do I store this snack for later?
Keep toppings separate if prepping ahead. Add crunchy granola or nuts just before eating to maintain crispness.
5. How long can I keep the yogurt jar in the fridge?
Seal the jar tightly after assembling. Store in the fridge for up to 24 hours for best freshness and texture.
6. Should I add toppings before or after storing?
Add toppings just before eating for maximum crunch. If making in advance, keep toppings in a separate container.
7. Can I reheat the snack jar?
To reheat, gently warm in the microwave for about 10 seconds—just enough to take the chill off without melting toppings.
8. What kind of jar should I use?
Use a small, wide-mouth jar for easier layering and cleaning—makes the process smoother and less messy.
9. What if my toppings get soggy?
If toppings become soggy, splash a little honey or drizzle some extra syrup to refresh their crunch and flavor.
10. What fruits are best for the snack jar?
Choose ripe, fresh berries or fruits—juicy, fragrant, and vibrant in flavor, enhancing every spoonful.
This yogurt snack jar isn’t just a quick fix; it’s a little act of mindful eating, turning a simple combination into a moment of pause. I find myself reaching for it on busy mornings or when I need a quick, nourishing break that feels satisfying in every spoonful.
In a world that’s constantly rushing, these jars remind me to slow down and enjoy the small pleasures—crisp nuts, bright berries, creamy yogurt—each bite a small celebration of straightforward, honest flavors. Sometimes, that’s all I really need to reset and carry on.

Hi, I’m Madison Greene, the creator behind Texture Obsessed. If you have ever fallen in love with the crunch of a perfectly toasted crust, the silkiness of a smooth custard, or the contrast between crispy and creamy in a single bite, then you already understand what inspires me.

