Most folks know chicken cutlets as quick, straightforward weeknight fare, but I’ve found a way to turn them into something almost indulgent. It starts with a gentle poaching, which sounds odd, but it keeps the meat insanely tender and juicy—like it’s been marinated in its own goodness. Baking afterward finishes it off with a crisp edge, without risking the dryness that sometimes comes with oven-cooked chicken.
This recipe became a little obsession of mine after a disastrous dry bake left me craving something more forgiving. The surprise was how the poaching step unlocks a softness that’s usually reserved for stews or braises, but here it’s all about the texture and flavor. I love how adaptable it is—pair it with herbs, lemon, or whatever’s in the fridge, and it still shines.
Focusing on the unexpected tenderness of baked chicken cutlets achieved through a gentle initial poaching step before baking, turning a typically dry cutlet into a juicy, melt-in-your-mouth experience.
Tenderness through Poaching
- This recipe reminded me of Sunday dinners at grandma’s, where simple chicken was turned into something special with just a few honest steps.
- I felt a rush of pride when I nailed the perfect crispy crust — it’s not as easy as it looks, but totally worth the effort.
- There’s a quiet relief in knowing I can turn out juicy, tender chicken without fuss, even on my busiest nights.
- Just the smell of these baking fills the kitchen with a warm, nostalgic aroma that makes everyone gather around the stove.
- Every time I make these, I remember how satisfying it is to master a technique that transforms a humble ingredient into a crowd-pleaser.
The story behind this recipe
- This recipe took shape after a kitchen mishap where dry, overcooked chicken was all I could manage. I started experimenting with gentle poaching just to save the meat from drying out, and it turned into a revelation. Baking afterward gave it that satisfying crunch on the outside without sacrificing the juiciness inside.
- The first time I tried it, I was surprised by how tender and flavorful the chicken became—like it had been marinated in its own juices. It’s become my go-to for busy weeknights because it’s honest, straightforward, and almost foolproof. Plus, the aroma of baking chicken with garlic and herbs takes me straight back to family dinners and Sunday afternoons.
- heading: ‘The story behind this recipe’
Historical and Cultural Tidbits
- Chicken cutlets became popular in American kitchens in the early 20th century, thanks to their quick cooking time and versatility.
- The technique of baking breaded proteins like chicken cutlets was often a healthier alternative to frying, emerging in post-war home cooking.
- In some regions, chicken cutlets are traditionally served with lemon and capers, a nod to Mediterranean influences that merged into American cuisine.
- The term ‘cutlet’ originally comes from the French ‘côtelette,’ referring to a small rib or slice of meat, but it evolved to mean thin, breaded meat portions in the US.
- This recipe’s gentle poaching step is a modern twist inspired by sous-vide techniques, which aim to preserve moisture and tenderness.
Key Ingredient Breakdown
- Chicken breasts: I prefer skinless, boneless breasts—they stay juicy if you don’t overcook. Try a different cut if you want more flavor, but adjust cook time for tenderness.
- Salt: I hit the chicken with a generous sprinkle; it’s essential for flavor. Too much can make it salty, so taste your seasoning before baking.
- Lemon: I love a bright squeeze of lemon after baking, but you can skip it or use lime for a different zing—adds a fresh, citrusy punch.
- Herbs: Fresh parsley or thyme add a fragrant touch, but dried works too—just use less, about half the amount, since it’s more concentrated.
- Olive oil: I drizzle a little before baking for crispness, but if you want less fat, use a spray or skip it altogether—crust will be slightly less golden.
- Breadcrumbs: For that crispy topping, I prefer panko because it’s airy and crunchier, but regular breadcrumbs work fine. Toast them lightly beforehand for extra flavor.
- Garlic: Minced garlic gives a savory aroma, but roasting it first can mellow the bite and deepen the flavor—experiment to match your taste.
Spotlight on key ingredients
Chicken breasts:
- I prefer skinless, boneless breasts—they stay juicy if you don’t overcook. Try a different cut if you want more flavor, but adjust cook time for tenderness.
- Salt: I hit the chicken with a generous sprinkle; it’s essential for flavor. Too much can make it salty, so taste your seasoning before baking.
- Lemon: I love a bright squeeze of lemon after baking, but you can skip it or use lime for a different zing—adds a fresh, citrusy punch.
Breadcrumbs and herbs:
- Breadcrumbs: For that crispy topping, I prefer panko because it’s airy and crunchier, but regular breadcrumbs work fine. Toast them lightly beforehand for extra flavor.
- Herbs: Fresh parsley or thyme add a fragrant touch, but dried works too—just use less, about half the amount, since it’s more concentrated.
- Olive oil: I drizzle a little before baking for crispness, but if you want less fat, use a spray or skip it altogether—crust will be slightly less golden.
Notes for ingredient swaps
- Dairy-Free: Skip the egg wash or use a dairy-free milk with breadcrumbs. It might slightly alter the crust’s adhesion but keeps it crisp.
- Gluten-Free: Replace panko with crushed gluten-free crackers or almond meal. Expect a different crunch and slightly denser texture.
- Low-Sodium: Use less salt in the breadcrumb mixture and water poaching step. Enhances natural chicken flavor without overpowering saltiness.
- Herb Variations: Swap parsley or thyme for basil or oregano. Offers a different aromatic profile, bright and more Mediterranean.
- Oil Choices: Use avocado or vegetable oil instead of olive oil for a neutral flavor and higher smoke point, preserving crispness.
- Breadcrumbs: Use crushed cornflakes for an extra crunch or try grated Parmesan for a cheesy crust—adds richness and depth.
- Lemon: Add lemon zest into breadcrumbs for a more intense citrus aroma, or skip for a milder, more subdued flavor.
Equipment & Tools
- Baking dish: To bake the chicken evenly.
- Meat thermometer: To ensure proper internal temperature.
- Shallow bowl: For breading station.
- Cooking water saucepan: For gentle poaching.
- Paper towels: To dry chicken and remove excess moisture.
- Cooking brush or spray: To apply oil evenly.
Step-by-step guide to baked chicken cutlets
- Equipment & Tools: Gather a baking dish (for even heat), a meat thermometer (to check internal temp), and a shallow bowl (for breading).
- Place chicken breasts in a single layer in a saucepan. Cover with cold water. Bring to a gentle simmer over medium heat (~75°C / 167°F). Cook for 10 minutes, just until slightly firm but not cooked through.
- Remove chicken from water, pat dry with paper towels. Let rest for 5 minutes to settle juices.
- Preheat oven to 200°C / 390°F. Line your baking dish with parchment or lightly oil it.
- Prepare breading: Mix panko breadcrumbs with minced garlic, chopped herbs, a pinch of salt, and a drizzle of olive oil in a shallow bowl.
- Flatten chicken slightly with a meat mallet for even thickness (~1.5 cm / 0.6 inch). Dip each cutlet into beaten egg, then press into breadcrumb mixture, coating thoroughly.
- Arrange coated cutlets on the prepared baking dish. Drizzle or spray lightly with olive oil to promote crispness.
- Bake in the preheated oven for 15-20 minutes. Check color—golden and crispy on the edges. The internal temperature should reach 74°C / 165°F.
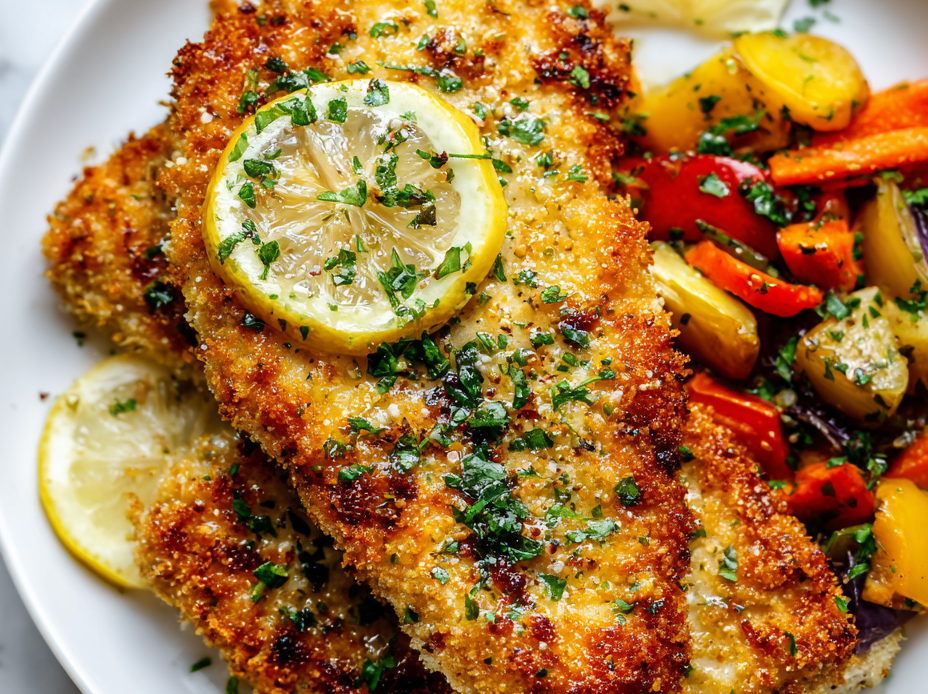
- Remove from oven. Rest for 3 minutes to let juices redistribute. Serve hot, garnished with lemon wedges or fresh herbs if desired.
Let the chicken rest for 3 minutes after baking. Serve on a platter, garnished with lemon or herbs. Pair with your favorite sides like roasted veggies or a simple salad.
How to Know It’s Done
- Color: golden brown and crispy edges.
- Internal temp: at least 74°C / 165°F on a probe.
- Texture: meat should feel firm but not dry when pressed.
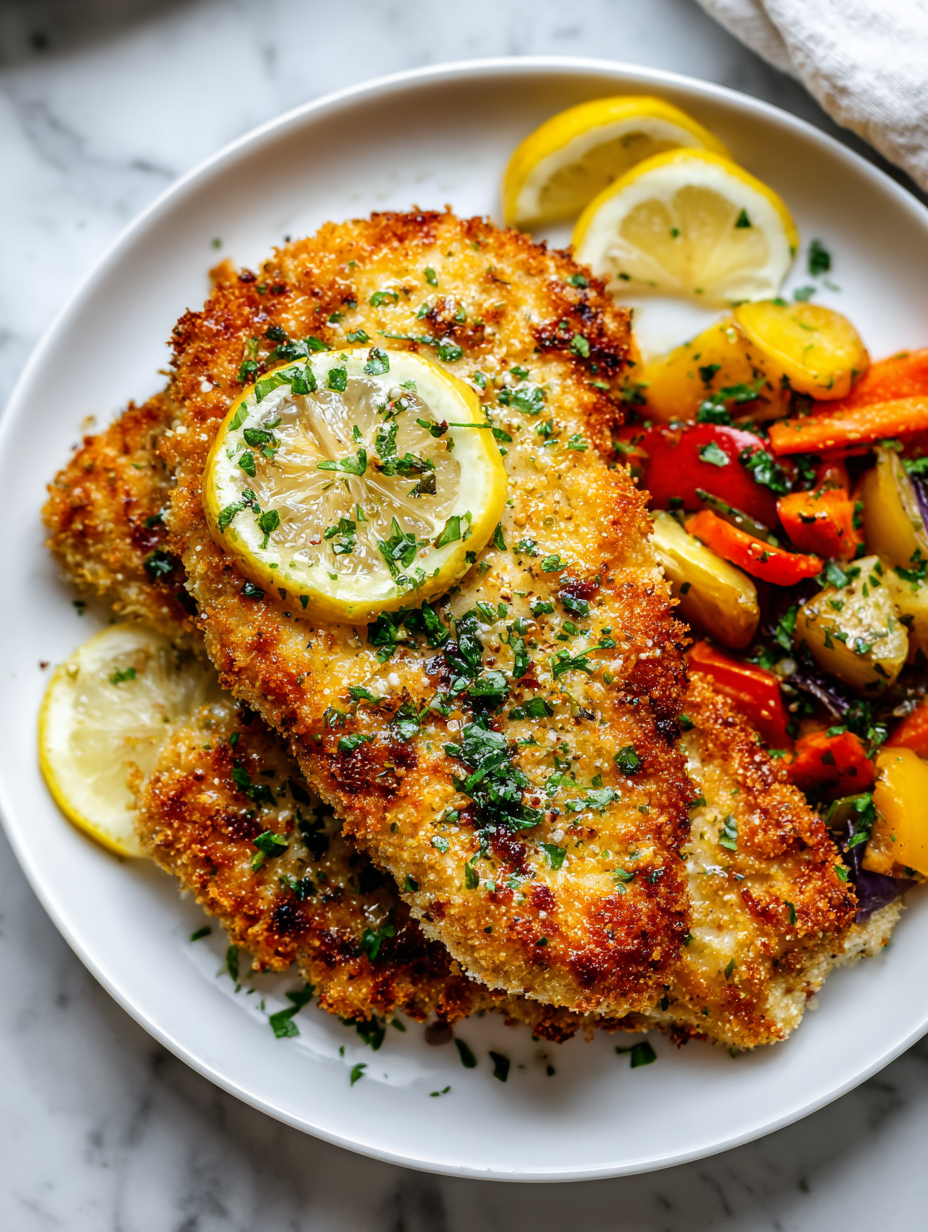
Juicy Baked Chicken Cutlets
Ingredients
Equipment
Method
- Place the chicken breasts in a saucepan and cover with cold water. Add a teaspoon of salt and bring to a gentle simmer over medium heat. Cook for about 10 minutes until the chicken is just firm but not fully cooked through.
- Remove the chicken from the water and pat dry thoroughly with paper towels. Let rest for 5 minutes to settle the juices.
- Preheat your oven to 200°C (390°F). Line a baking dish with parchment or lightly oil it to prevent sticking.
- While the oven heats, prepare your breadcrumb mixture by combining panko, minced garlic, chopped parsley, dried thyme, and 1 tablespoon of olive oil in a shallow bowl.
- Flatten each chicken breast slightly with a meat mallet or rolling pin to an even thickness of about 1.5 cm (0.6 inch) for uniform baking.
- Dip each chicken breast into the beaten egg, ensuring full coverage, then press into the breadcrumb mixture, coating evenly on all sides.
- Arrange the coated chicken cutlets on your prepared baking dish. Drizzle or spray lightly with the remaining olive oil to promote crispiness.
- Bake in the preheated oven for 15-20 minutes, until the crust is golden brown and crispy. Check that the internal temperature reaches at least 74°C (165°F) with a meat thermometer.
- Remove from oven and let rest for 3 minutes. Squeeze fresh lemon over the chicken for a bright, zesty finish.
- Serve the chicken cutlets hot, garnished with extra herbs or lemon wedges if desired, alongside your favorite sides.
Pro tips for perfect baked chicken cutlets
- & even: Use a gentle hand when coating the chicken to ensure a uniform crust with no clumps.
- Sensor check: Listen for a crackling sound when baking—indicates crispy breadcrumbs forming around the cutlets.
- Color cue: Aim for a golden-brown crust—if it looks too pale, give it a few more minutes, but watch closely to prevent burning.
- Oil application: Light spray or drizzle helps the breadcrumbs crisp up evenly without becoming greasy.
- Temperature target: Use a probe to ensure the internal temp hits 74°C / 165°F for juicy, safe chicken every time.
- Rest time: Let the cutlets sit for 3 minutes after baking—this helps juices redistribute and keeps the meat moist.
- Bread crumb toast: Toast your panko beforehand for an extra toasty, nutty flavor that really elevates the crunch.
Common mistakes and how to fix them
- FORGOT to preheat oven? Always start with a hot oven for even crispiness.
- DUMPED excess water? Dry chicken thoroughly to help breading stick better.
- OVER-TORCHED breadcrumbs? Keep an eye on the oven to prevent burning.
- MISSED the internal temp? Use a probe to make sure it’s juicy and safe.
Quick Fixes for Baked Chicken Cutlets
- When chicken releases water, splash with a little lemon juice to revive freshness.
- If breadcrumbs aren’t crisp enough, increase oven temperature slightly and bake a few minutes longer.
- Dumped too much oil? Pat the crust lightly with paper towels to absorb excess moisture.
- Over-torched breadcrumbs? Shield with foil and lower oven temp for a few minutes.
- If the chicken feels tough, rescue by slicing thin and serving with a flavorful sauce.
Prep, store, and reheat tips
- You can poach the chicken breasts a day ahead. Keep them refrigerated in an airtight container for up to 24 hours. The gentle steaming keeps the meat tender and juicy, which is crucial for a moist cutlet.
- Assemble the breaded coating a few hours in advance. Cover and store at room temperature; this helps the crumbs stay crisp and prevents them from becoming soggy before baking.
- Refrigerate the breaded chicken uncovered for 15-20 minutes before baking. This helps the coating set, ensuring a better crunch when baked.
- Leftover baked chicken cutlets keep well in the fridge for up to 3 days. Store in an airtight container, and reheat in a hot oven (about 180°C / 350°F) for 10 minutes until warmed through and crispy. Expect a slight loss of crispness but still juicy inside.
- To reheat, avoid the microwave if you want to preserve crispness. Instead, bake or air fry for a few minutes. The smell of warm herbs and toasted breadcrumbs will remind you how good these are—even cold, they’re still tasty.
Top questions about baked chicken cutlets
1. Why do I poach the chicken first?
Poaching keeps the chicken juicy and tender, preventing it from drying out during baking. It’s a gentle start that locks in moisture.
2. How do I know when the chicken is cooked?
Bake at around 200°C / 390°F until the crust is golden and crispy, usually 15-20 minutes. Use a thermometer to check for 74°C / 165°F inside.
3. What breadcrumbs work best?
Use panko breadcrumbs for extra crunch, and lightly spray or drizzle oil before baking for a crispy crust that isn’t greasy.
4. Can I skip poaching?
Yes, you can skip the poaching and bake directly, but the chicken might be slightly less tender and juicier with the poach step.
5. Can I use dried herbs instead of fresh?
Use fresh herbs like parsley or thyme for flavor. Dried herbs work too—just halve the amount since they’re more concentrated.
6. How long do leftovers last?
Refrigerate leftovers in an airtight container for up to 3 days. Reheat in a hot oven or air fryer to restore crispness.
7. What if the breadcrumbs burn or chicken isn’t done?
If breadcrumbs burn, cover the chicken loosely with foil and lower oven temp slightly. If chicken is underdone, give it a few more minutes and check temperature.
8. How do I check if it’s done?
Use a meat thermometer to ensure the internal temp hits 74°C / 165°F for safe, juicy chicken. Rely on color and texture as well.
9. Should I add lemon?
Adding a squeeze of lemon after baking brightens the flavor and adds a fresh, zesty contrast to the crispy crust.
10. Can I bake from frozen?
Yes, you can bake the cutlets from frozen, but add a few extra minutes. Ensure they reach 74°C / 165°F before serving.
This baked chicken cutlets recipe always feels like a small victory in my kitchen. The aroma of herbs and crispy edges filling the air makes even the busiest nights feel special. It’s a reminder that simplicity, done right, can turn an ordinary dinner into a moment of genuine satisfaction.
Every time I make these, I’m reminded of how honest ingredients and gentle techniques bring out the best in chicken. They’re perfect for cozy weeknights or casual get-togethers, and I love that they stay tender and flavorful without fuss. It’s a trusty recipe I keep coming back to, season after season.

Hi, I’m Madison Greene, the creator behind Texture Obsessed. If you have ever fallen in love with the crunch of a perfectly toasted crust, the silkiness of a smooth custard, or the contrast between crispy and creamy in a single bite, then you already understand what inspires me.

